Create a Checkout Flow
Objectives
In this lab, you will learn how to:
-
Setup stripe
-
Create a checkout flow
-
Test checkout
Creating a Checkout flow with Stripe
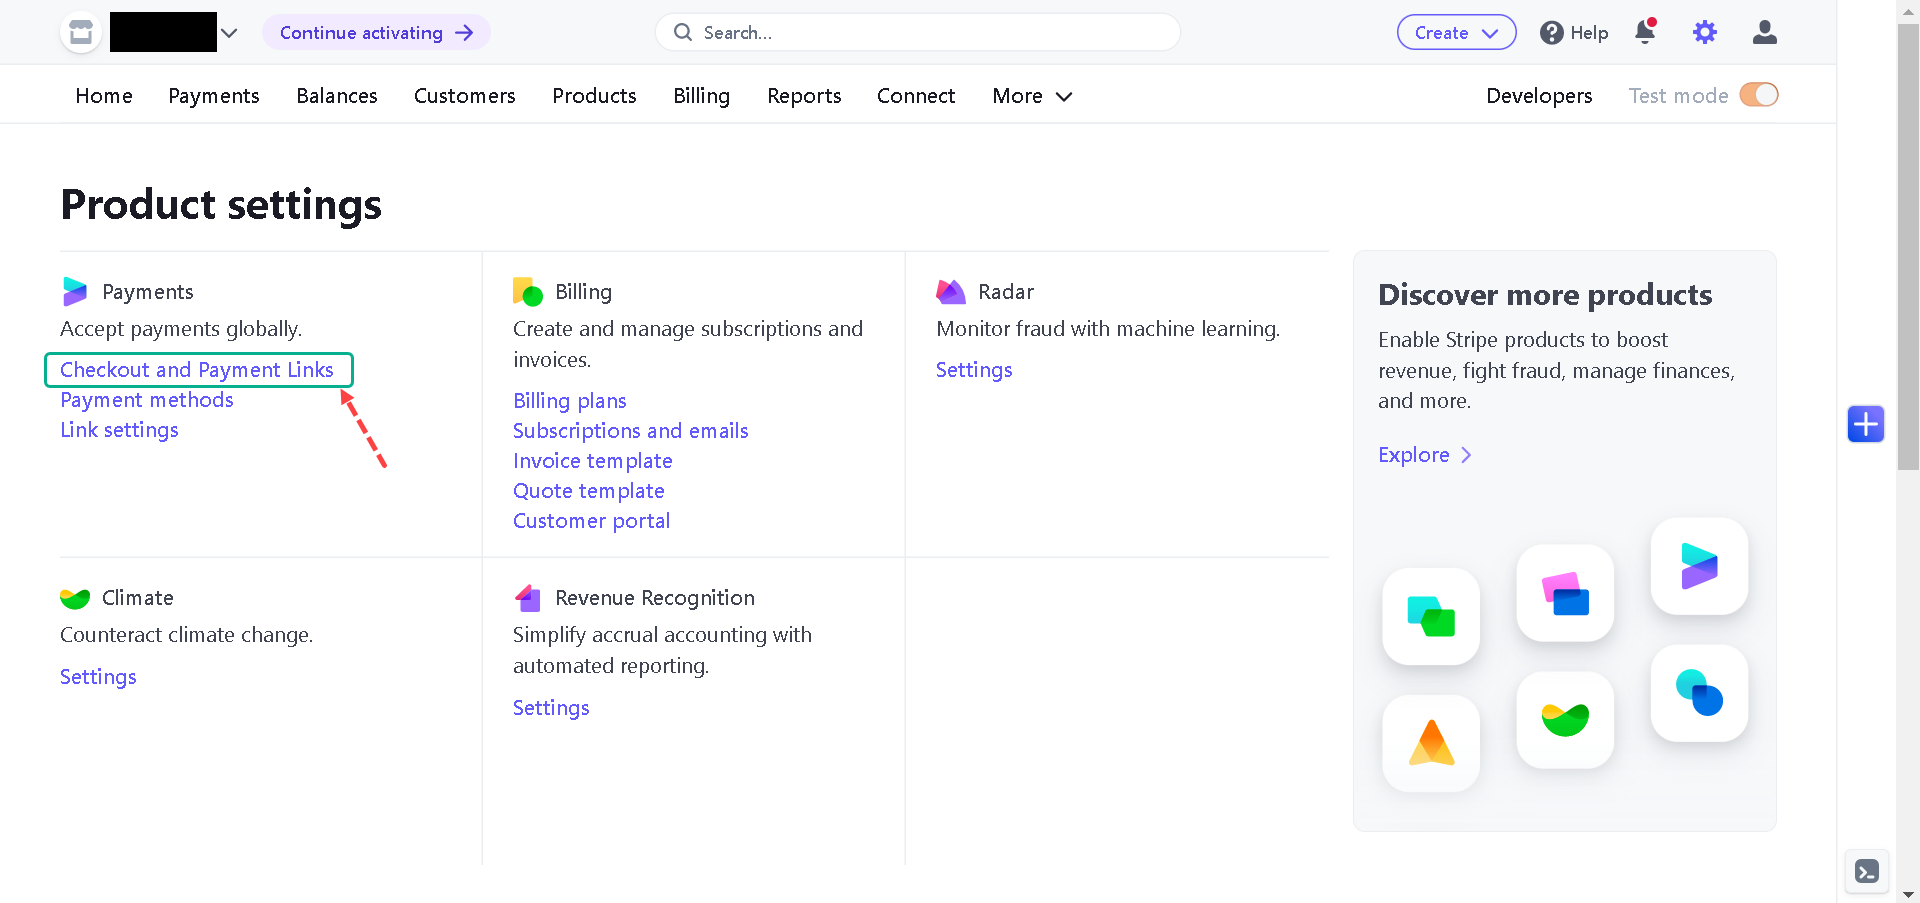
First, sign in to Stripe or create an account here; click on the Settings icon from the dashboard, click on the Checkout and Payment Links, and create a Company name.
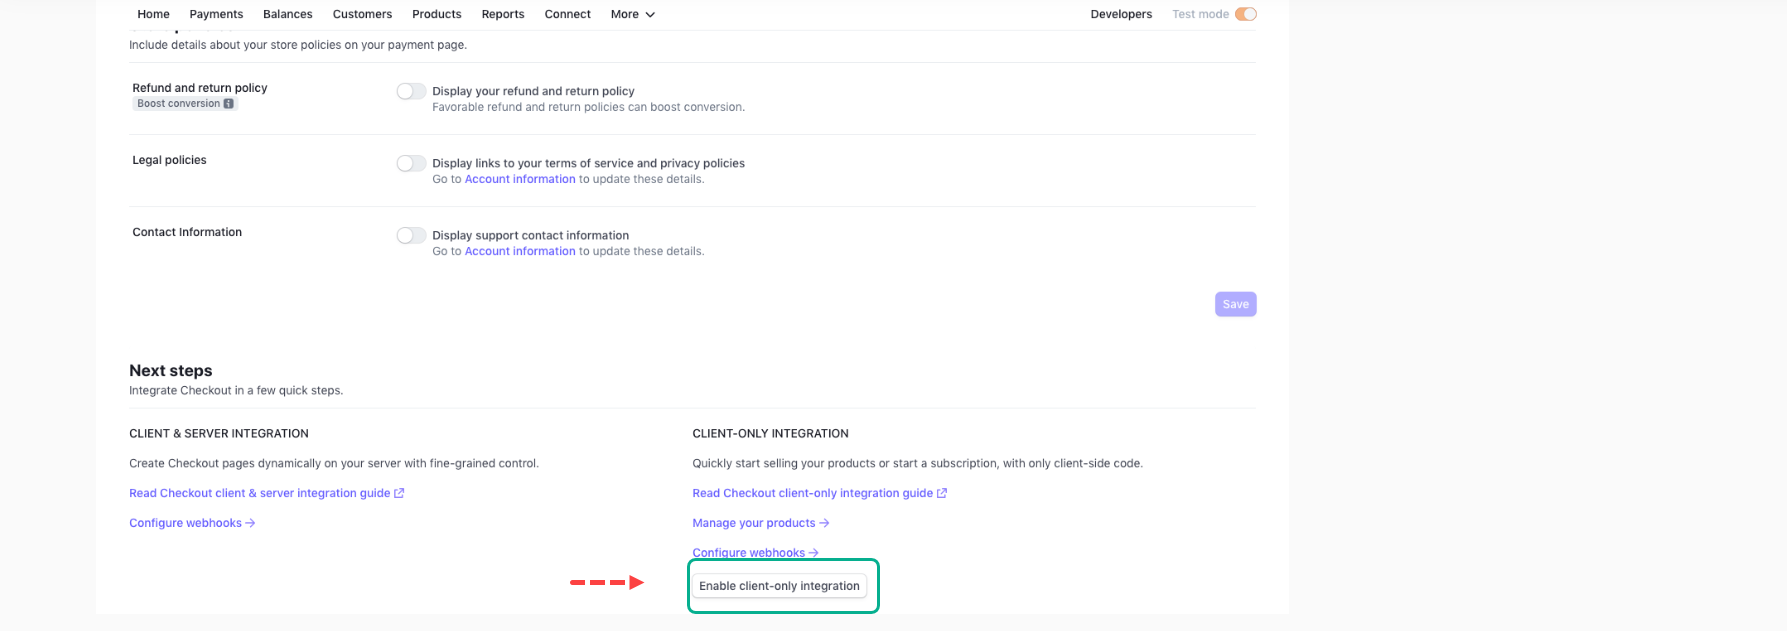
Next, scroll down and Enable client-only integration.
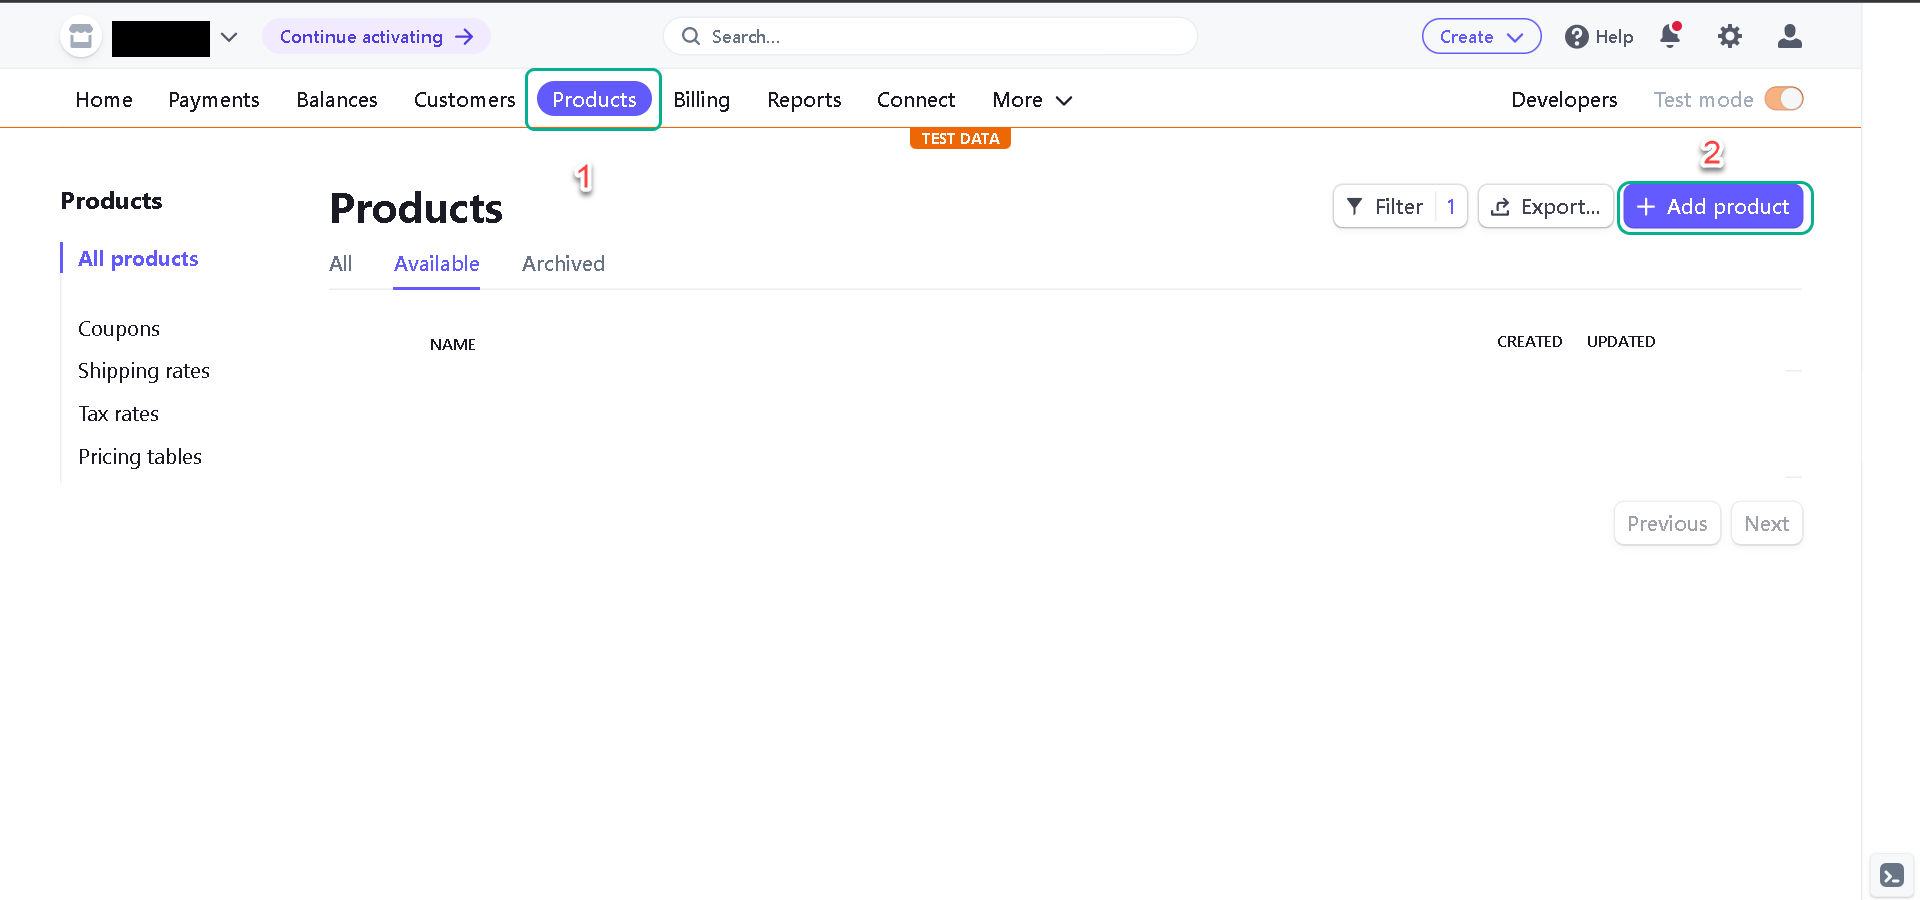
Next, navigate to the Products tab and create a product like in the below:
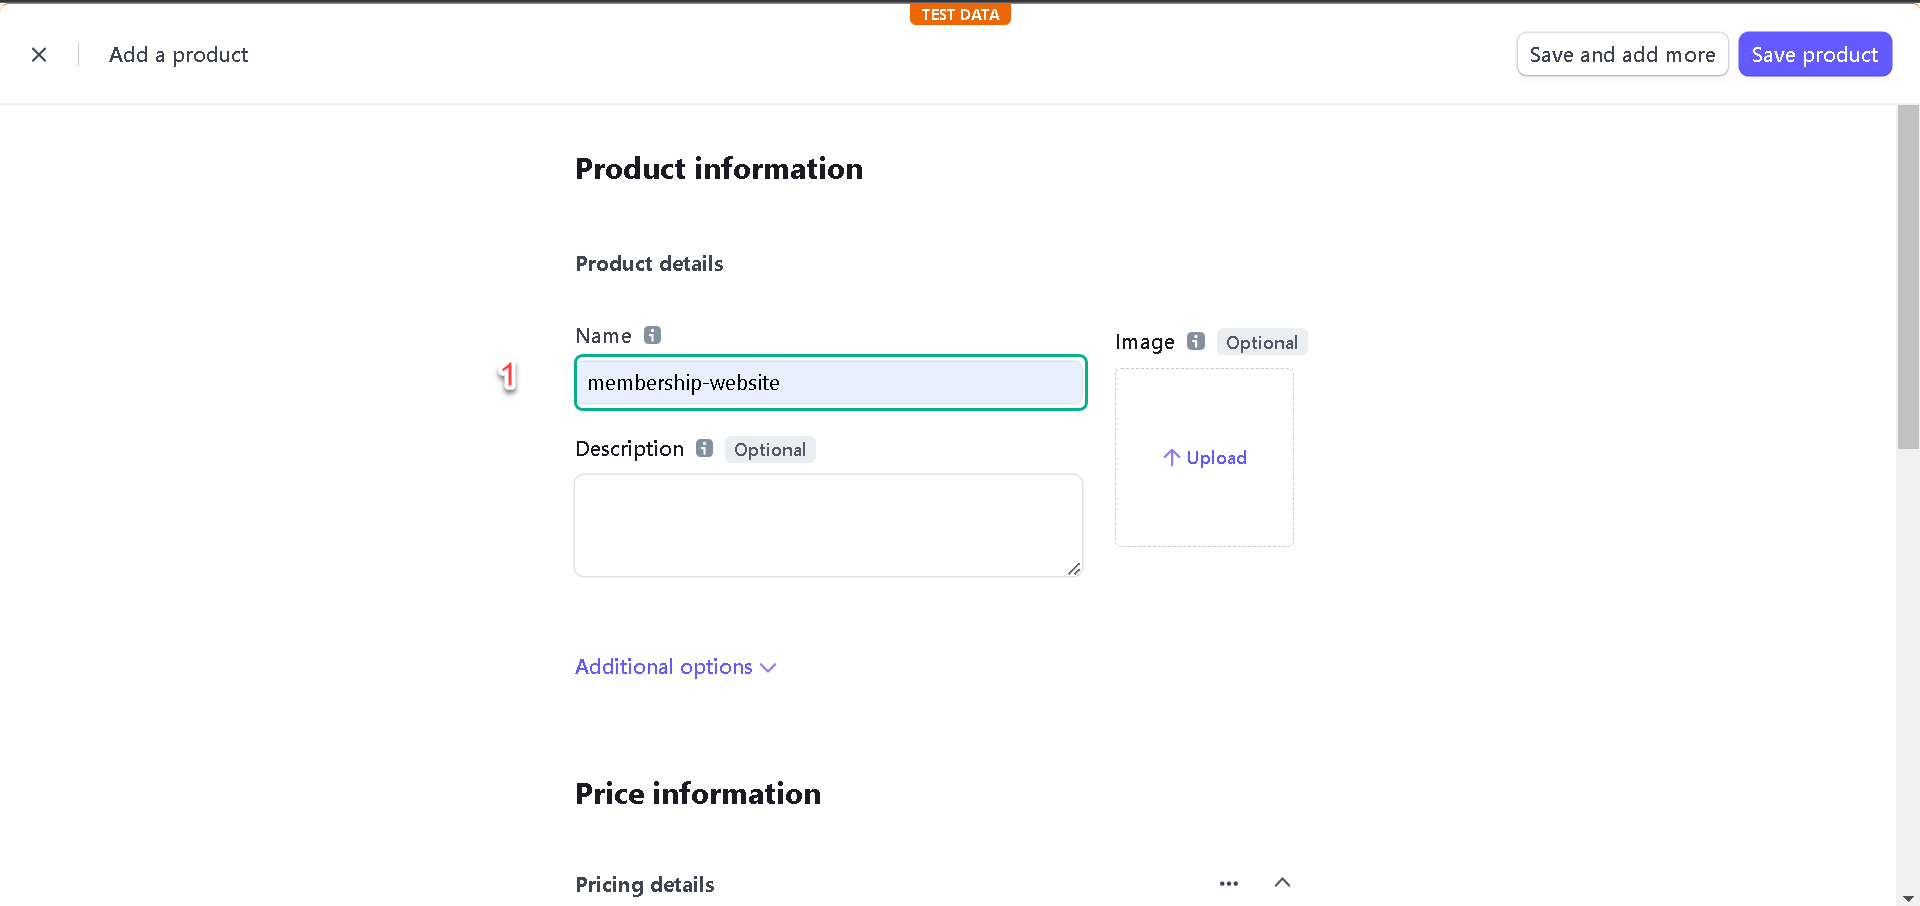
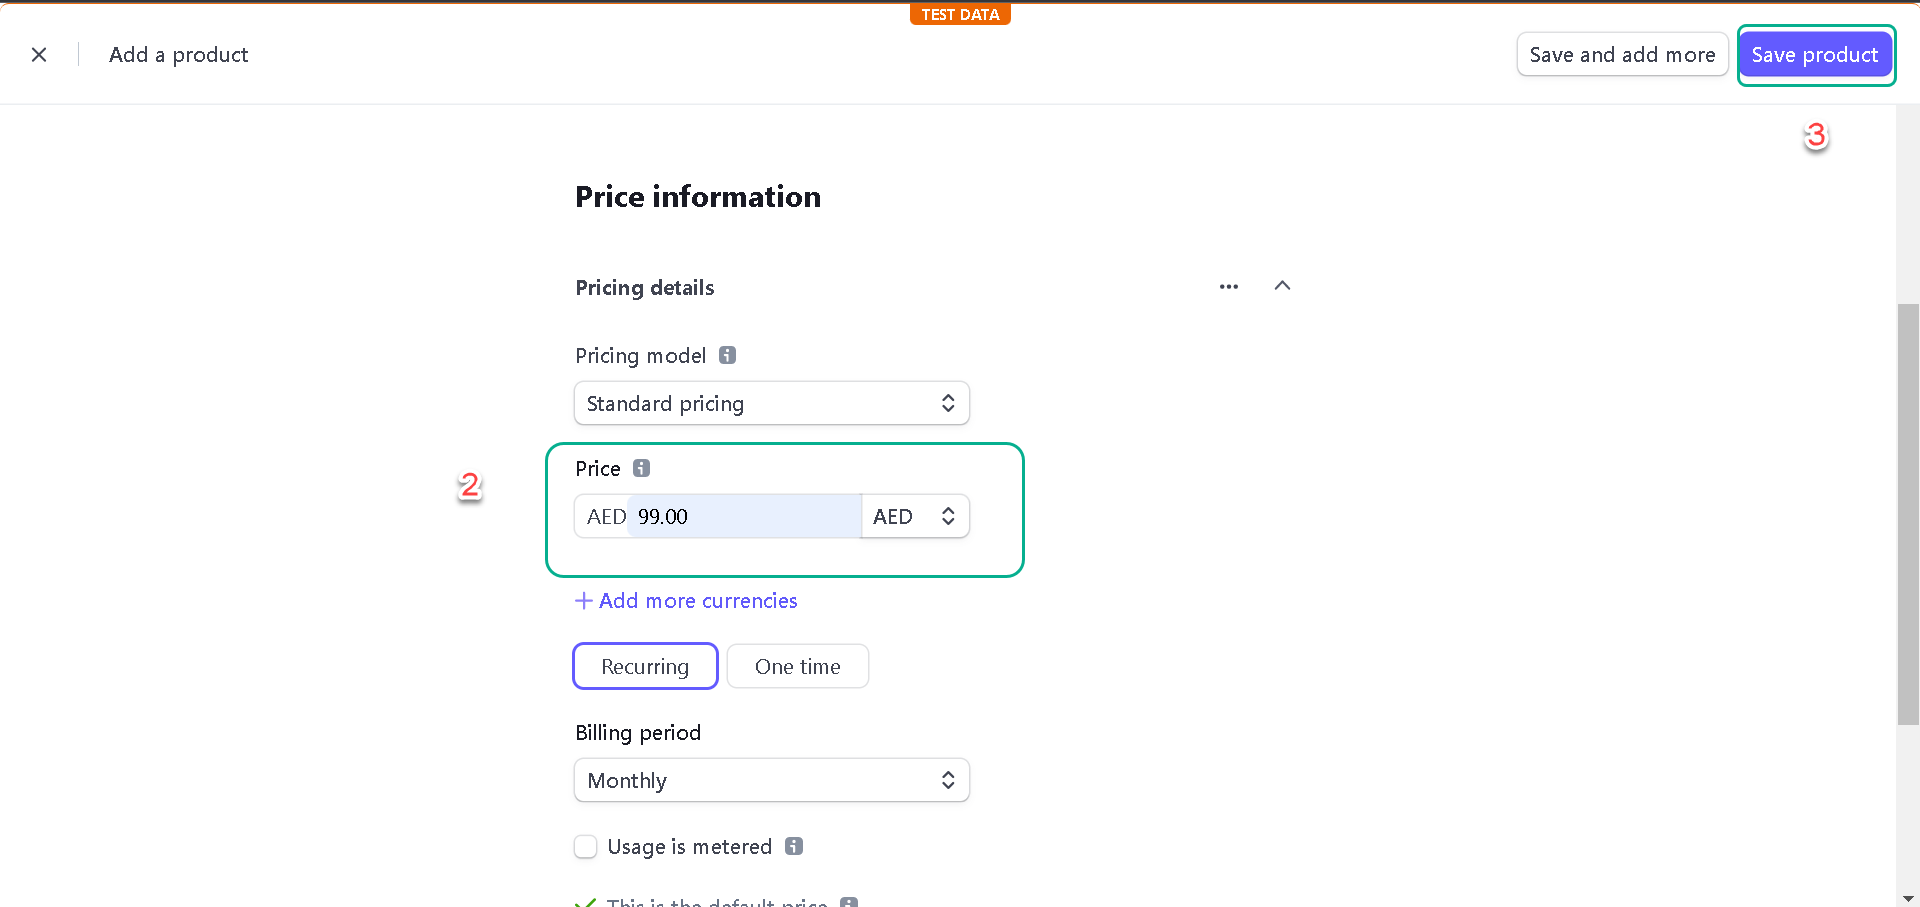
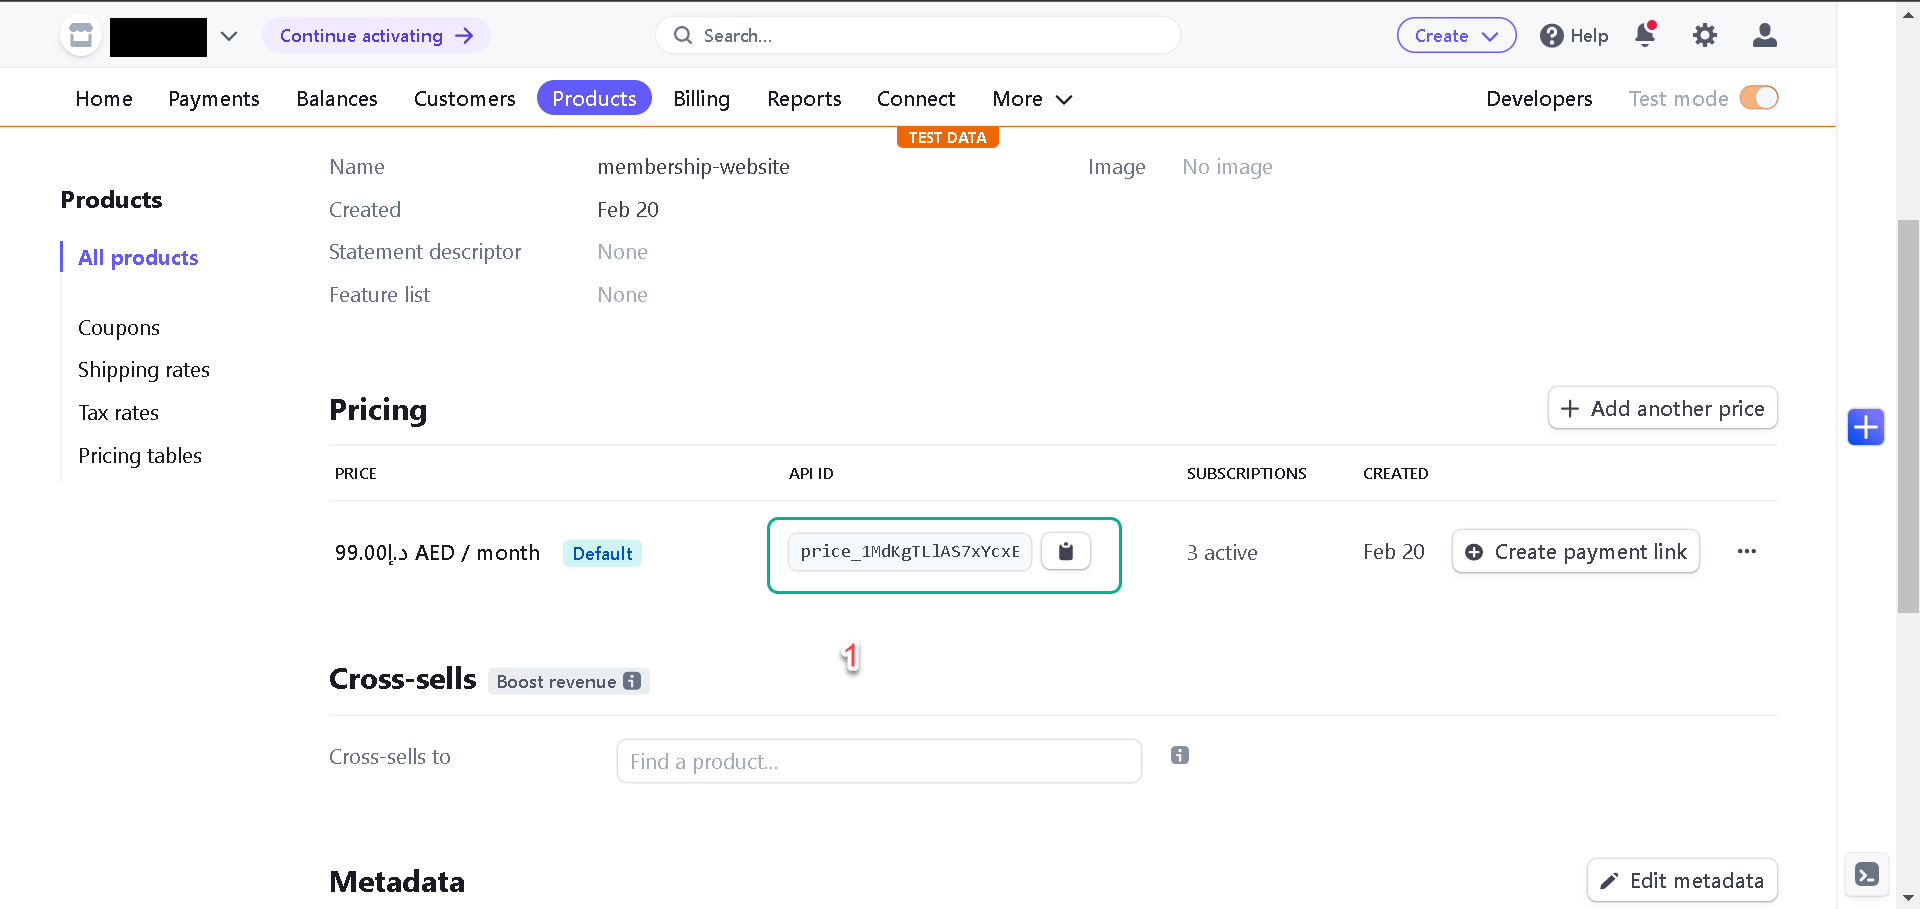
Save the product and grab the product price id; we’ll use it later to implement the checkout.
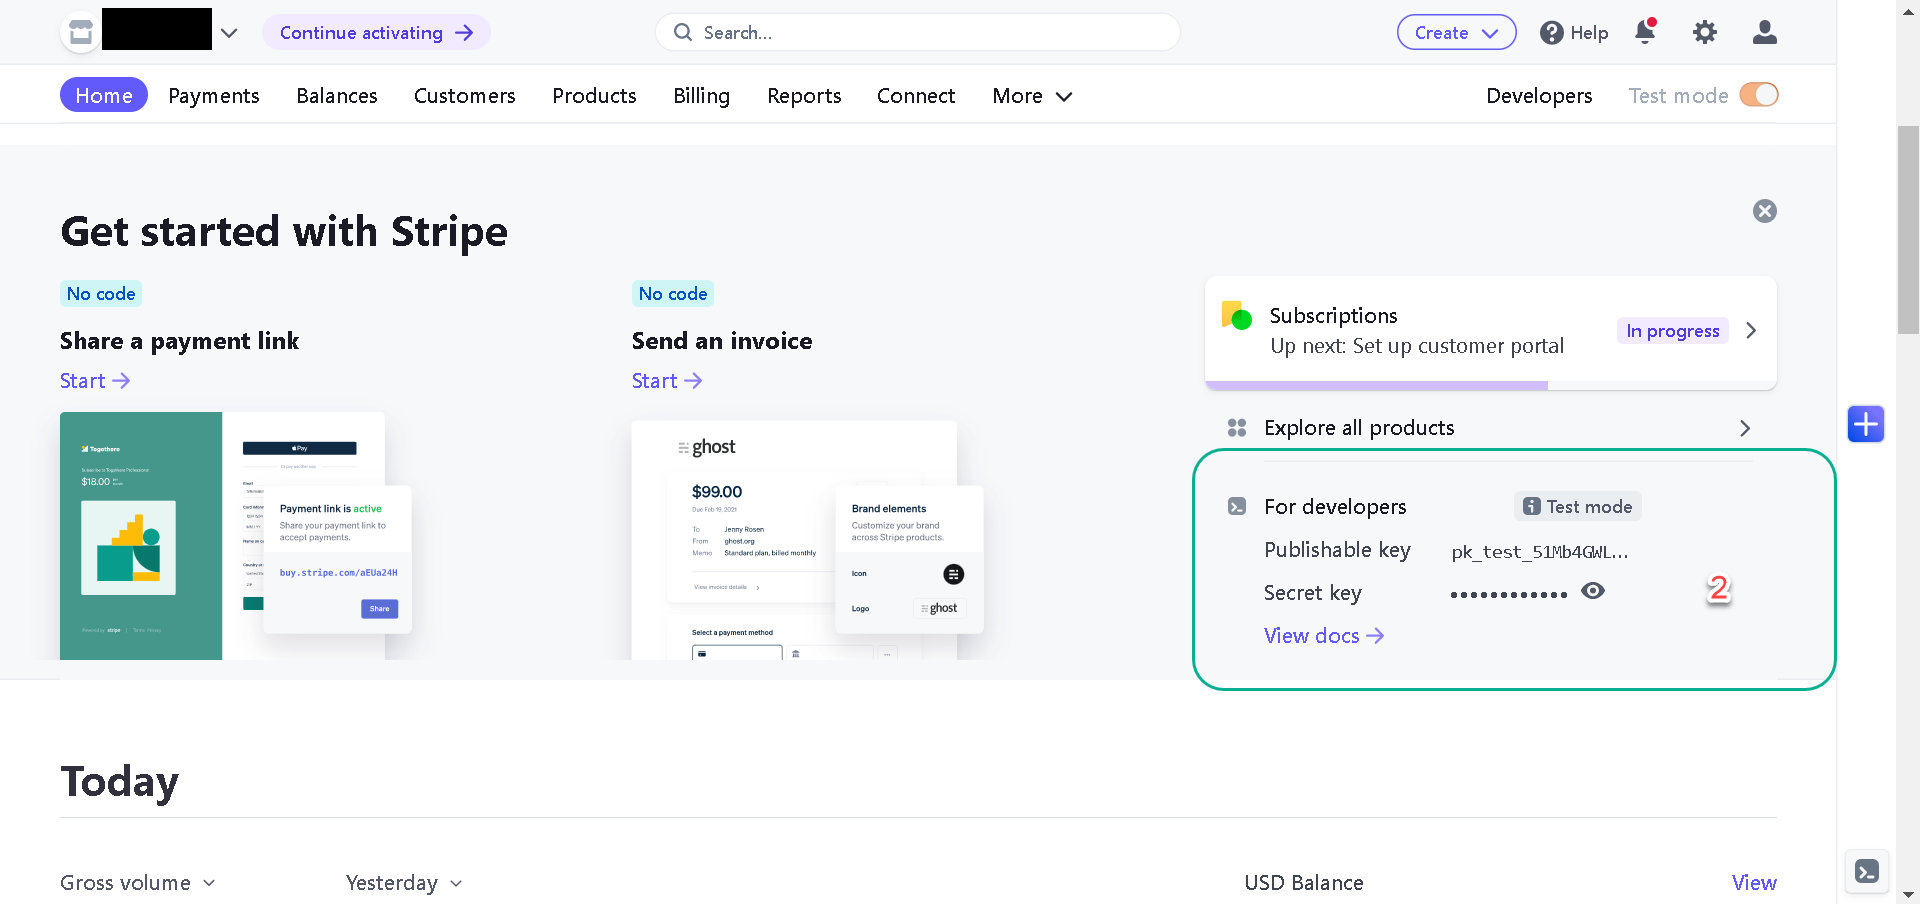
Next, grab the publishable key from the home page and let’s implement the checkout.
Next, install the Stripe client SDK with the following command:
npm install @stripe/stripe-js

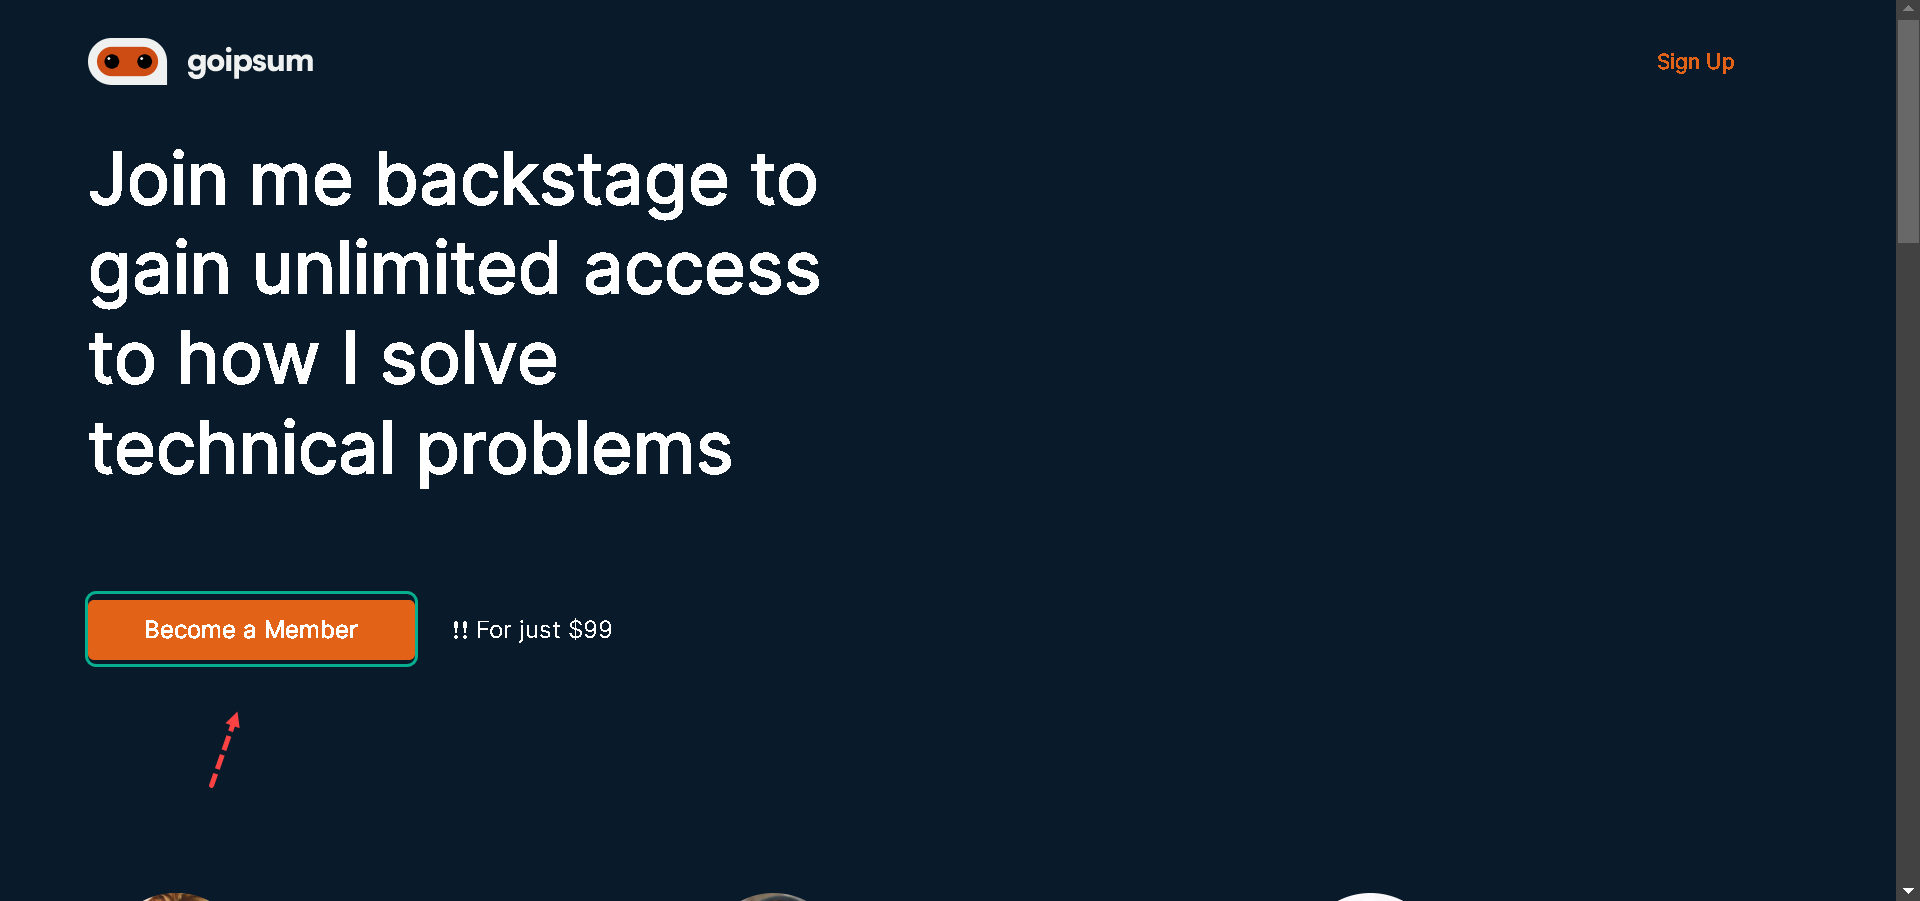
Now, let’s implement the checkout so that when a user clicks on the Become a Member button in the Hero Component, we will redirect the user to the Stripe checkout page to subscribe.
Let’s update the index.js file with the following snippets:
//pages/index.js
//other imports here
import { loadStripe } from "@stripe/stripe-js";
function index() {
// router here
async function handleClick() {
const stripe = await loadStripe(
"pk_test_51L4jXPKdTSV8bg8w0fz0kimSG031Xoc5jeB4gXeGCt8x7mASfkAYLQzmJSdYNTbQtNIdeHUnJin1xprNw3958ump00e9nhhn9v"
);
const { error } = await stripe.redirectToCheckout({
lineItems: [{ price: "price_1L4lEGKdTSV8bg8wWWfunlGh", quantity: 1 }],
mode: "subscription",
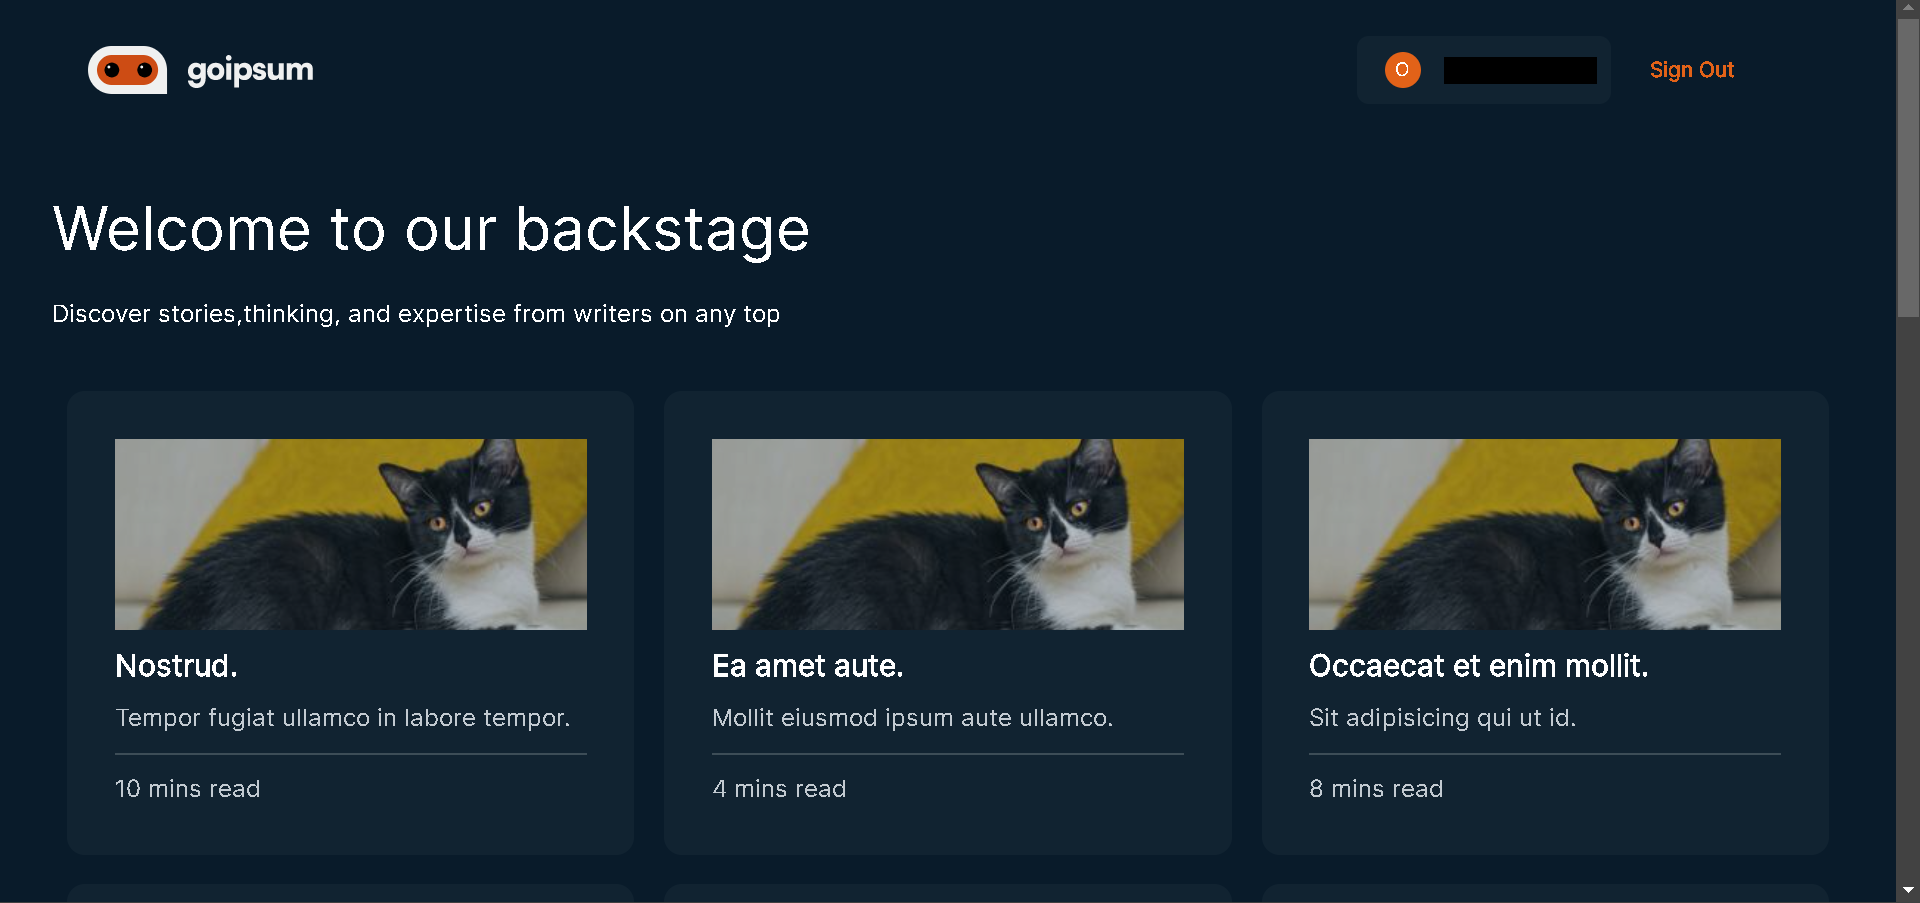
successUrl: "http://localhost:3000/post",
cancelUrl: "http://localhost:3000/cancel",
});
}
return (
<Layout
//handleClick here
authText="Sign Up"
username="none"
>
<View marginBottom="135px">
<Hero handleClick={handleClick} />
</View>
//other components here
</Layout>
);
}
export default index;
In the snippets above, we:
-
Imported loadStripe from “@stripe/stripe-js” and used the publishable key and price to implement the handleClick function.
-
Provided the success and canceled redirect URLs.
-
Passed the handleClick function to the Hero Component.
When users click on the Become a Member button, we’ll redirect them to the Stripe checkout page.
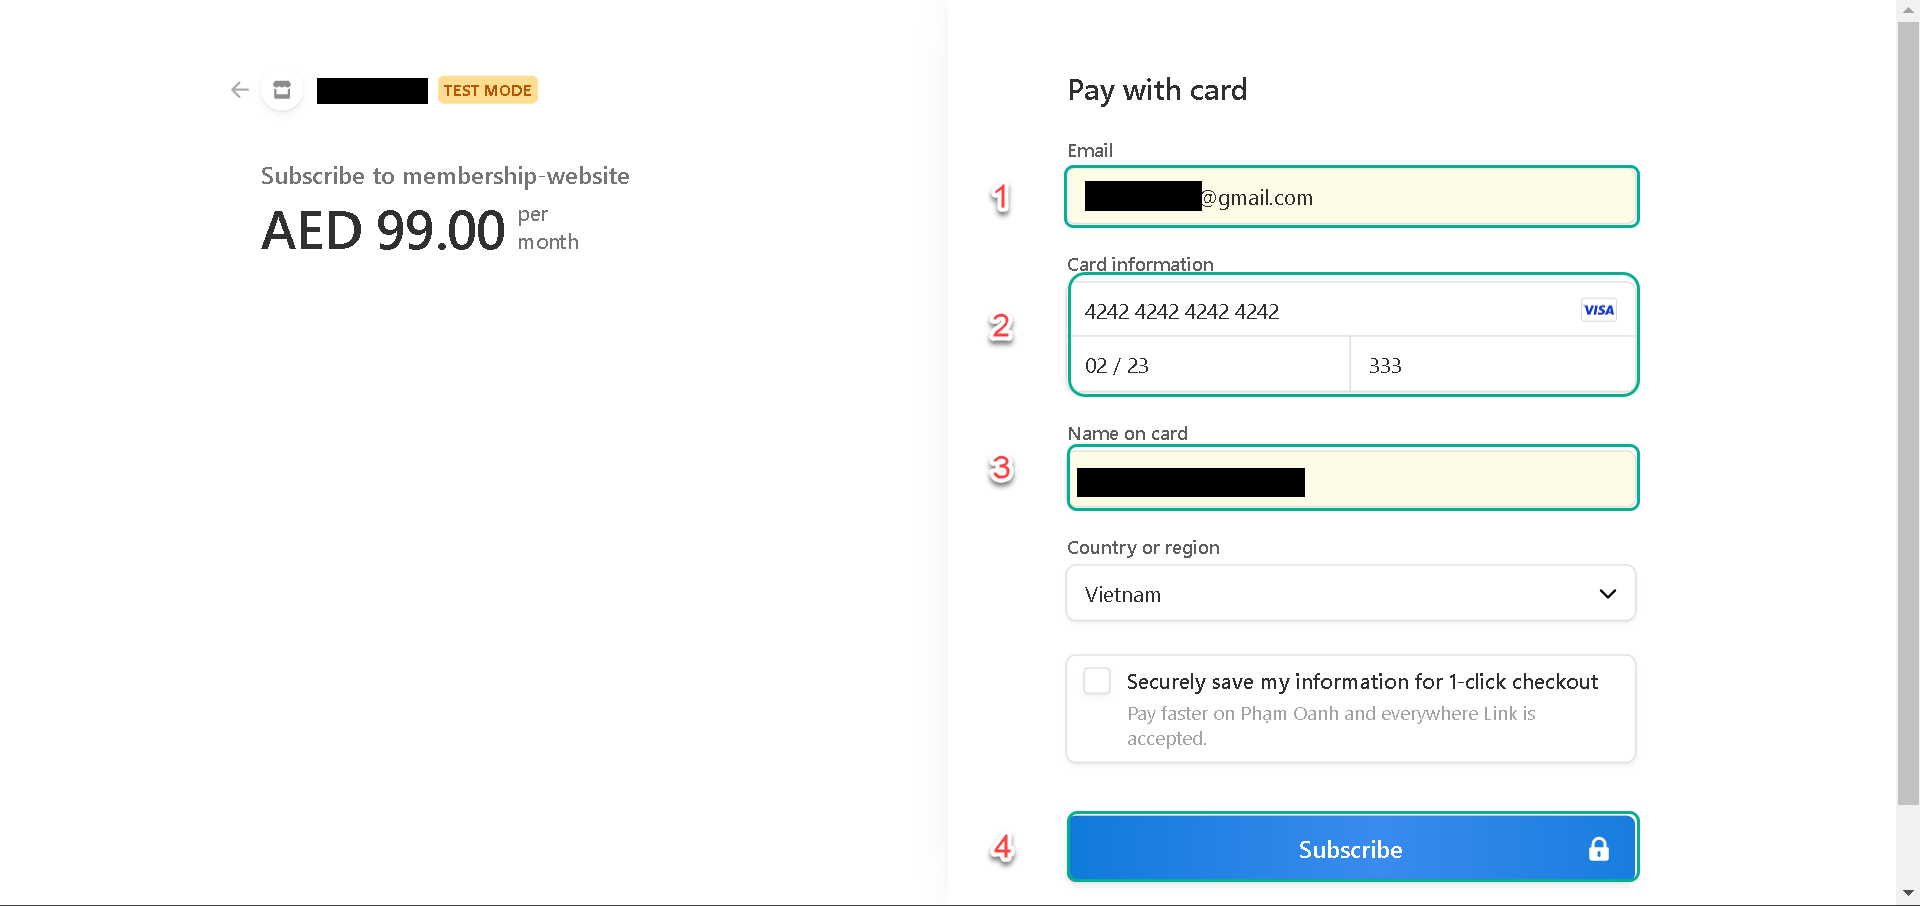
To test things out, click the button, enter the Stripe test card details, and on successful subscription, we’ll be redirected to the post page, as we specified in the handleClick function.
What’s Next?
In the next lesson, you’ll learn how to create accounts for users after they make payment.