Create an Amplify Project
Objectives
In this lab, you will learn how to:
-
Create an Amplify project
-
Setup authentication
-
Add data model
-
Generate fake data for your model
-
Import the components from Figma
Creating an Amplify Project
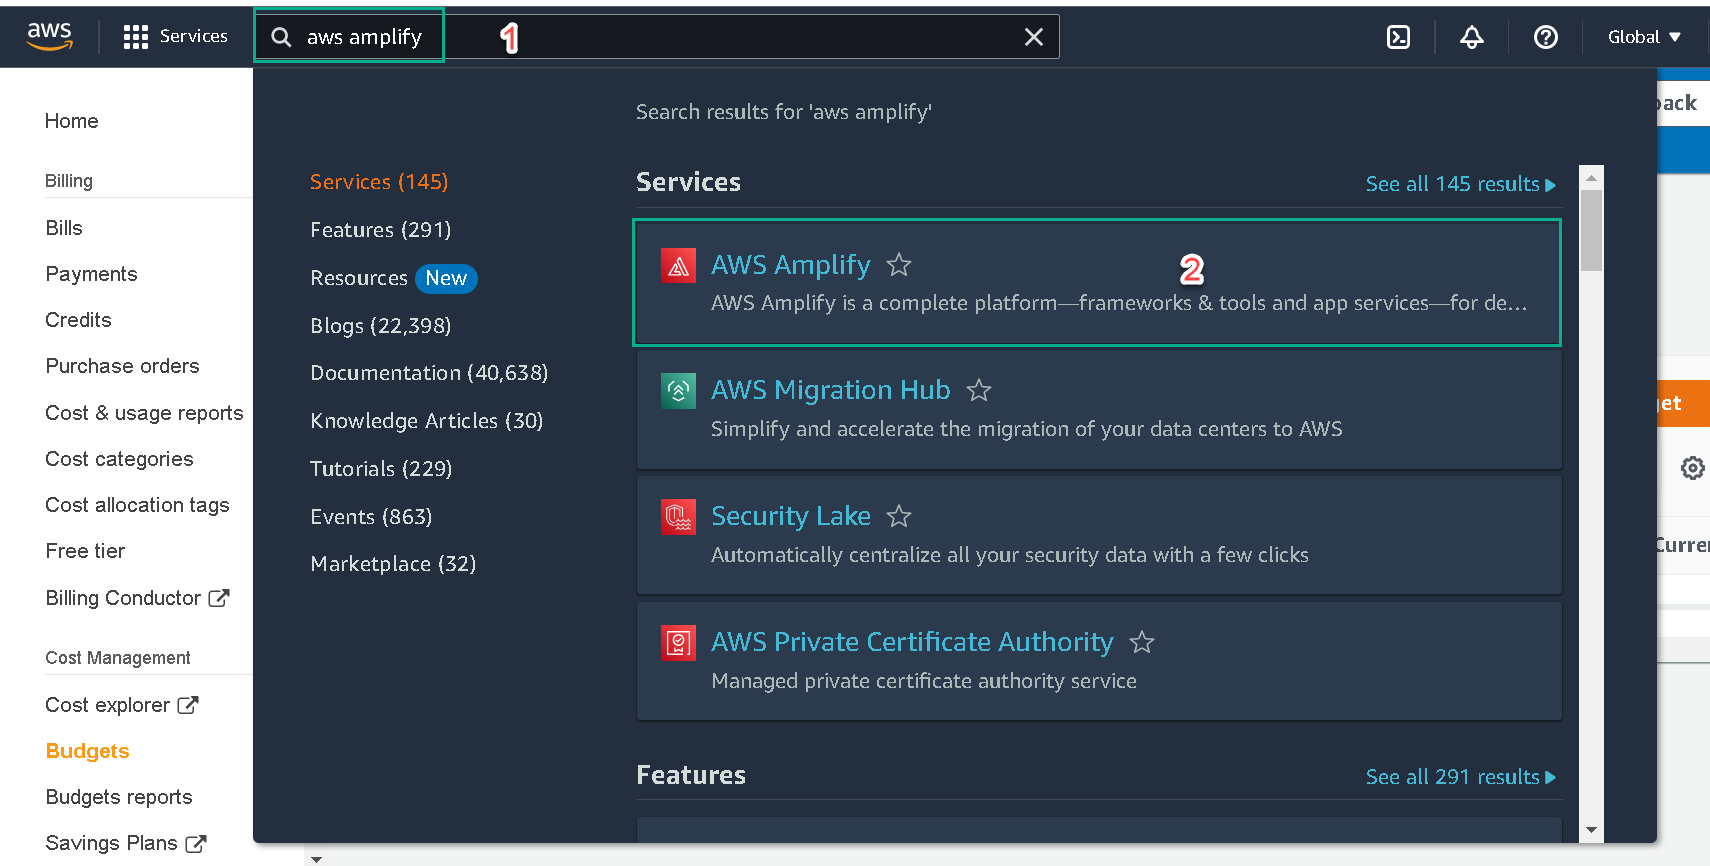
Log in to the AWS console, or create an account here. Search for AWS Amplify from the search bar and select it from the list of services.
Click Get Start
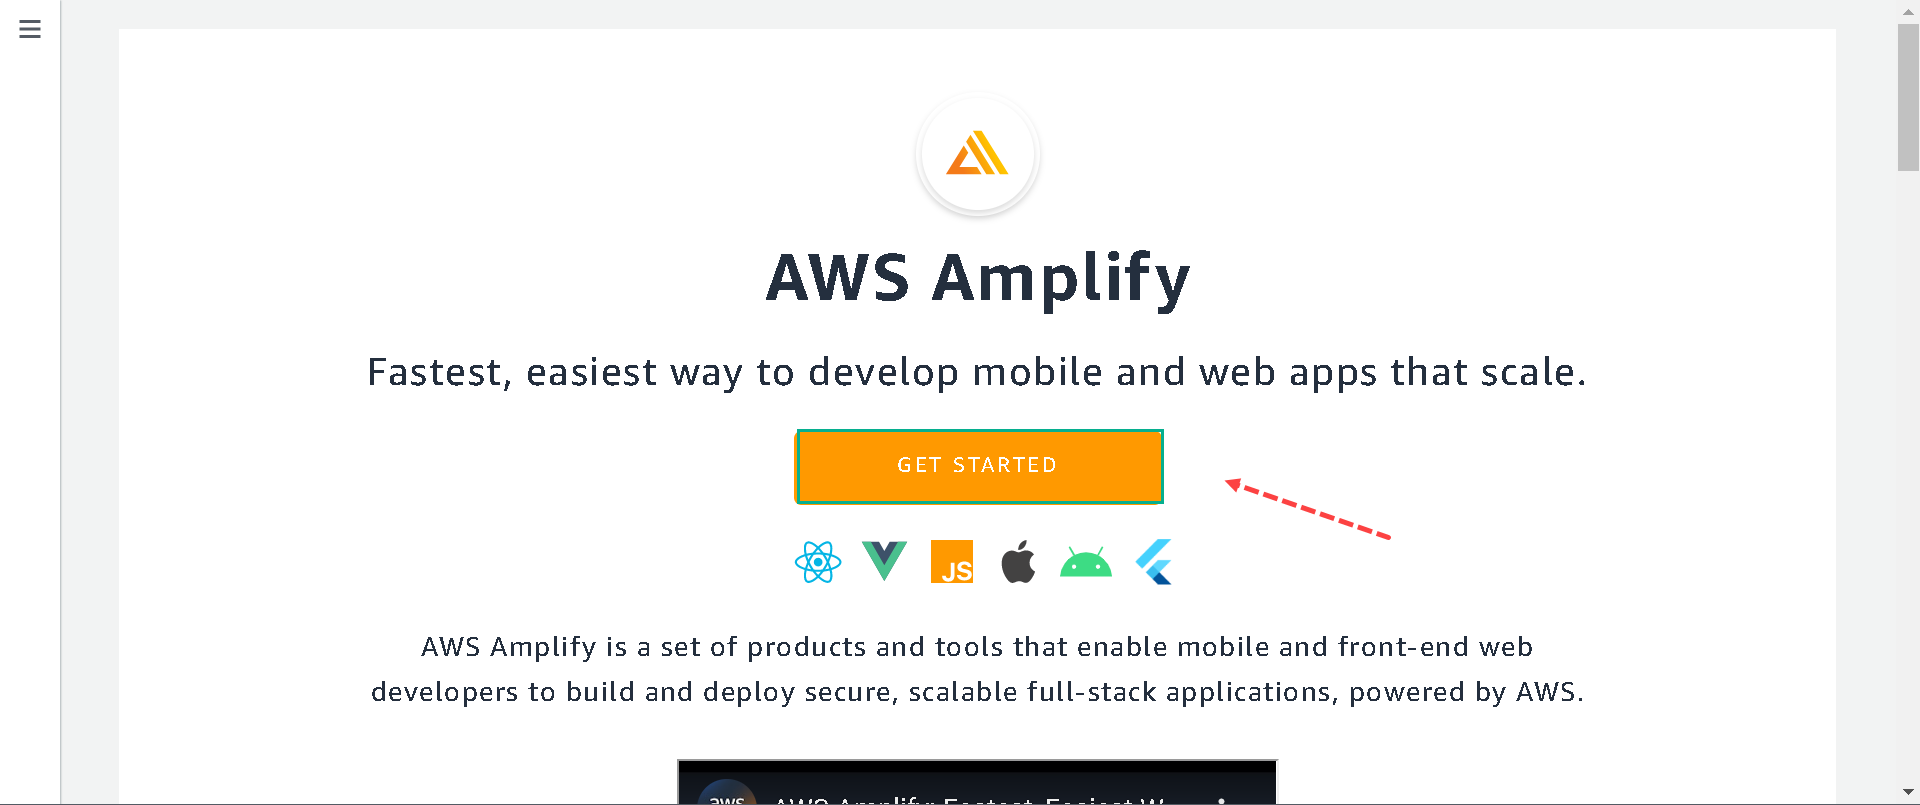
Next, click on the Get Start in item Build an app.
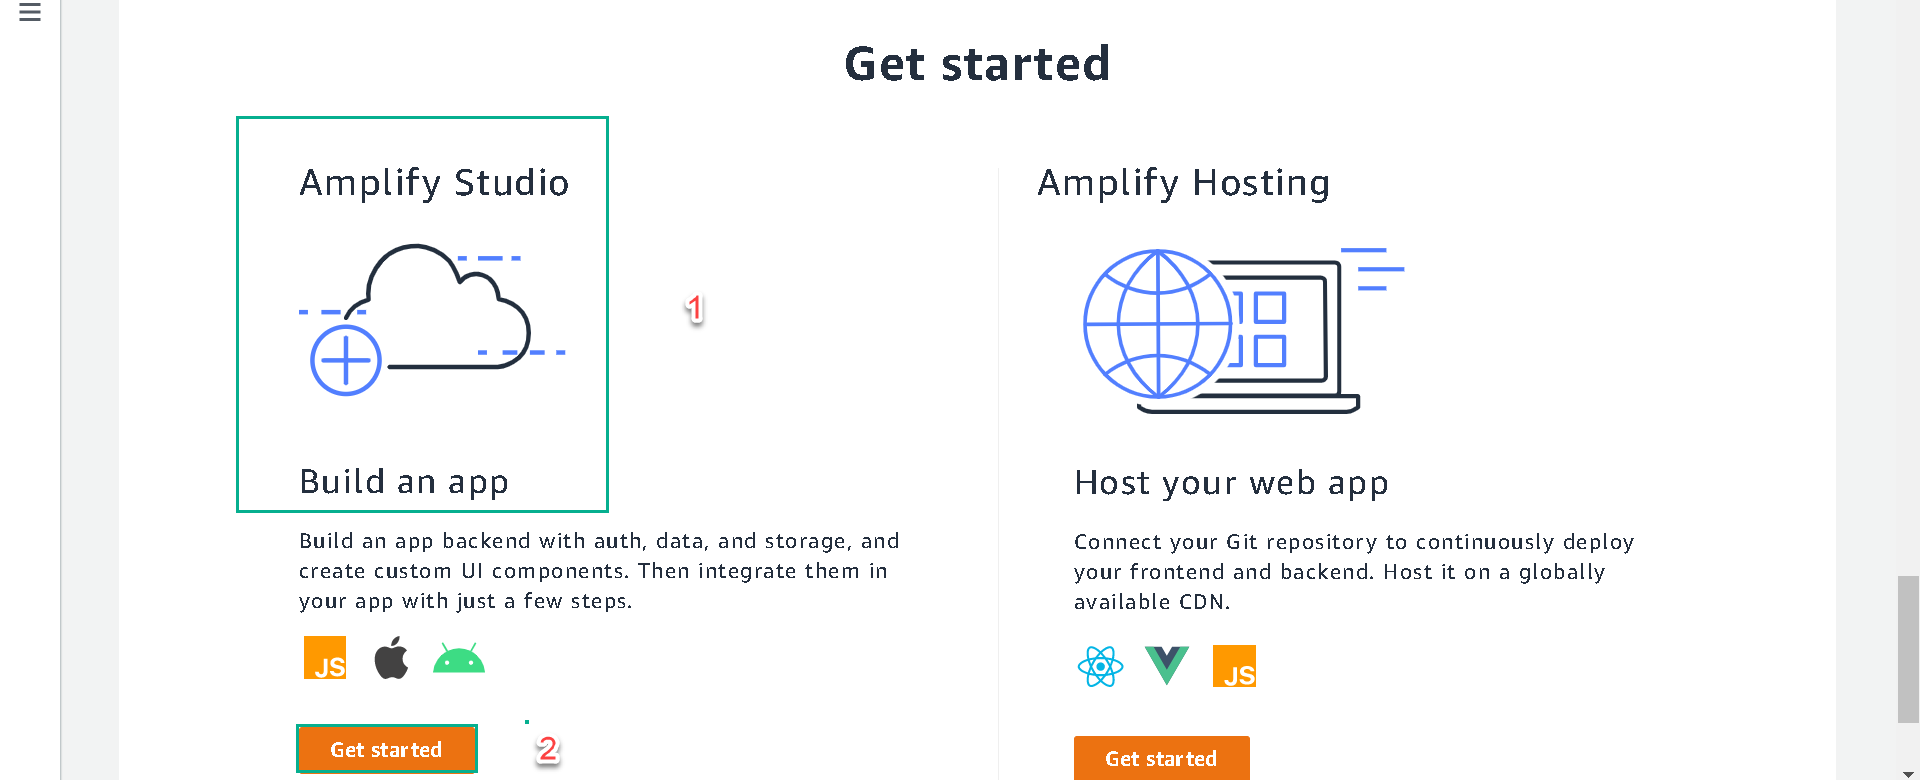
Give a name membership-website to the application and click the Confirm deployment button.
Wait to setting up

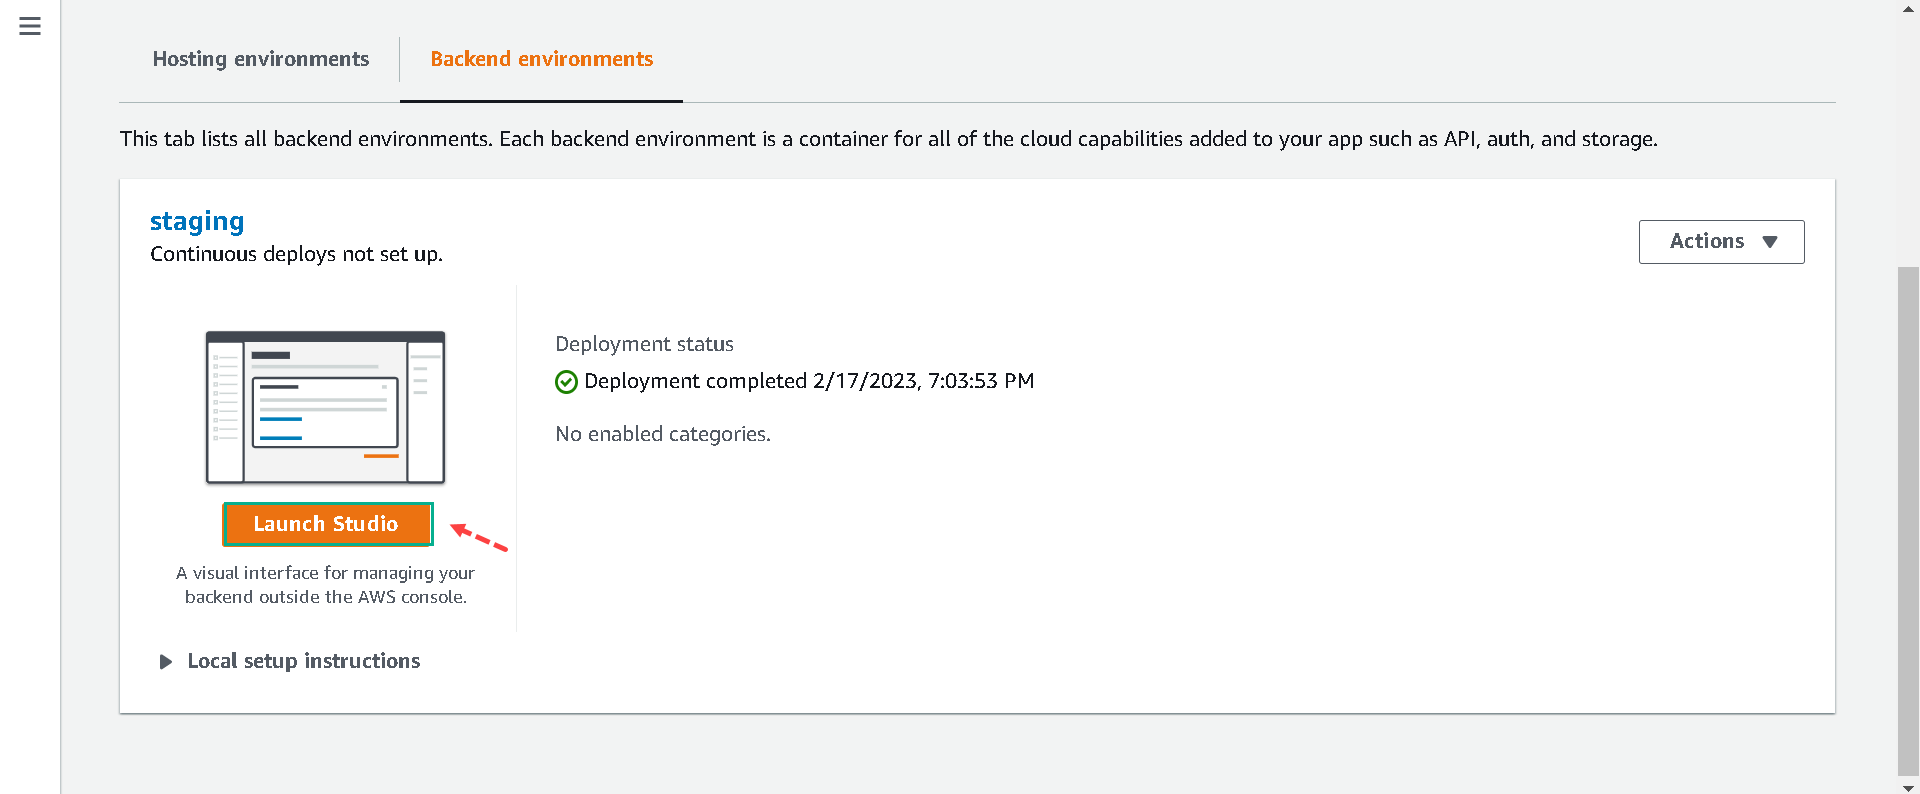
After the deployment process, click on the Launch studio button to launch a staging studio in a new tab.
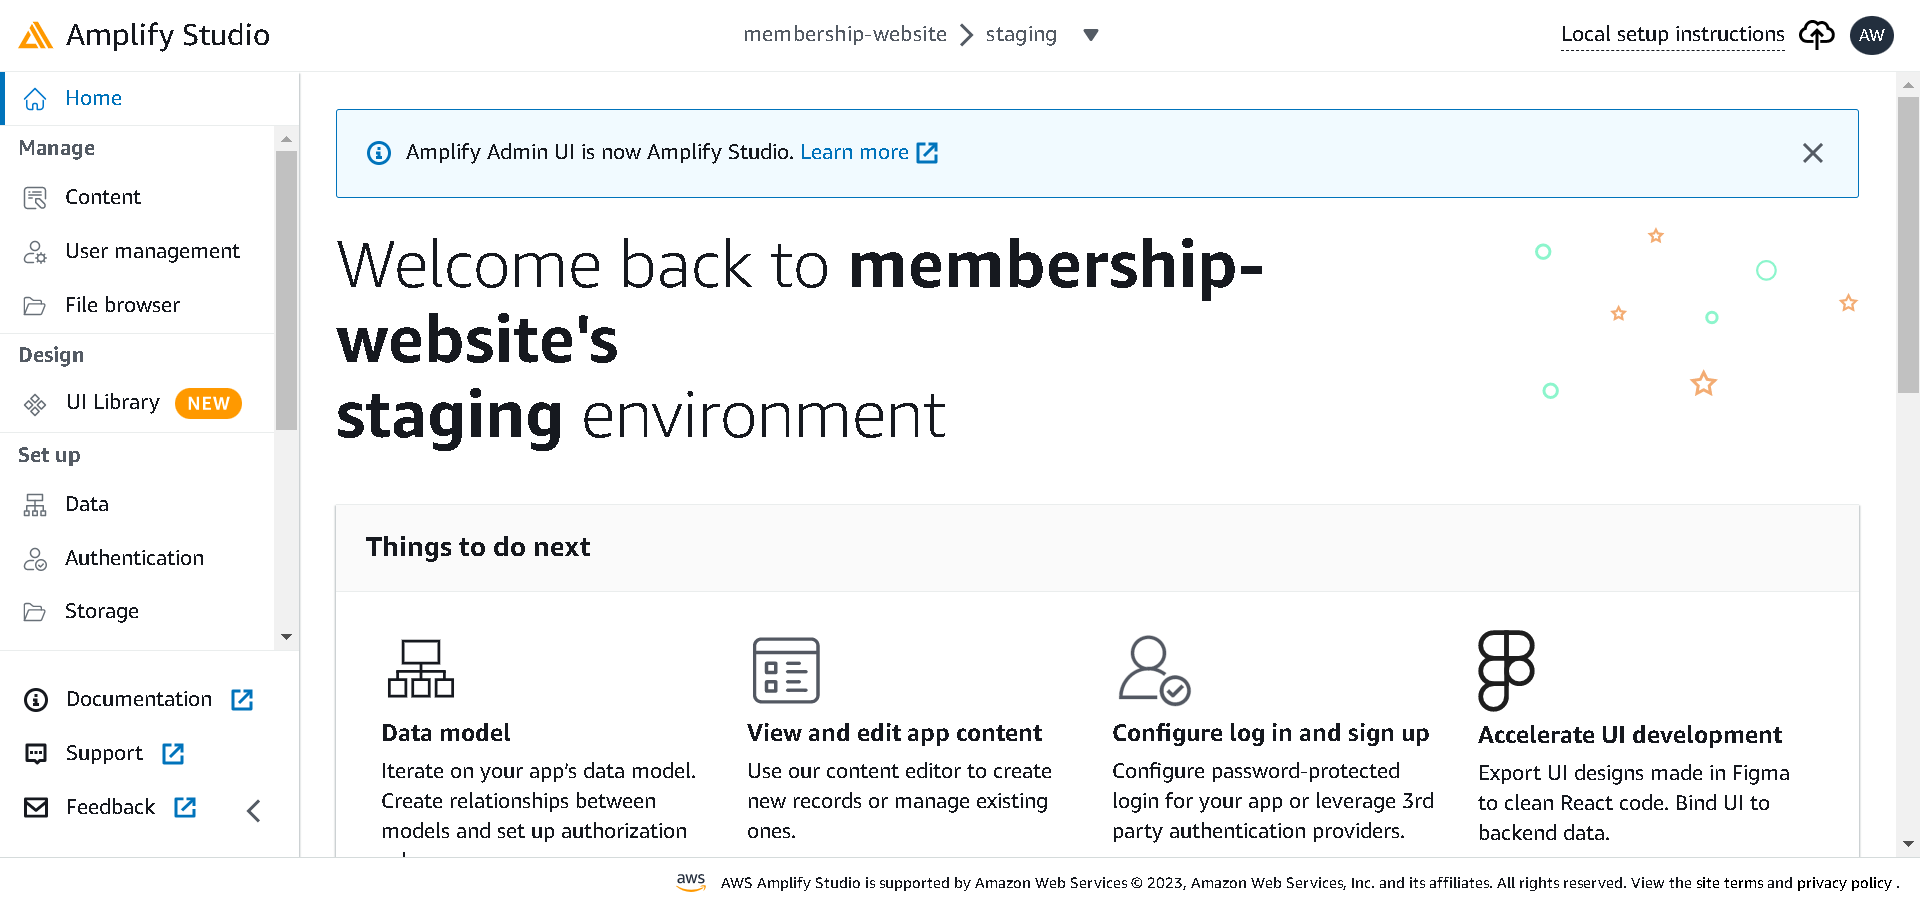
In the Amplify studio, we’ll add authentication to the project, model a database and deploy it, add contents to the database, and import UI components from Figma using the UI builder.
Adding Authentication
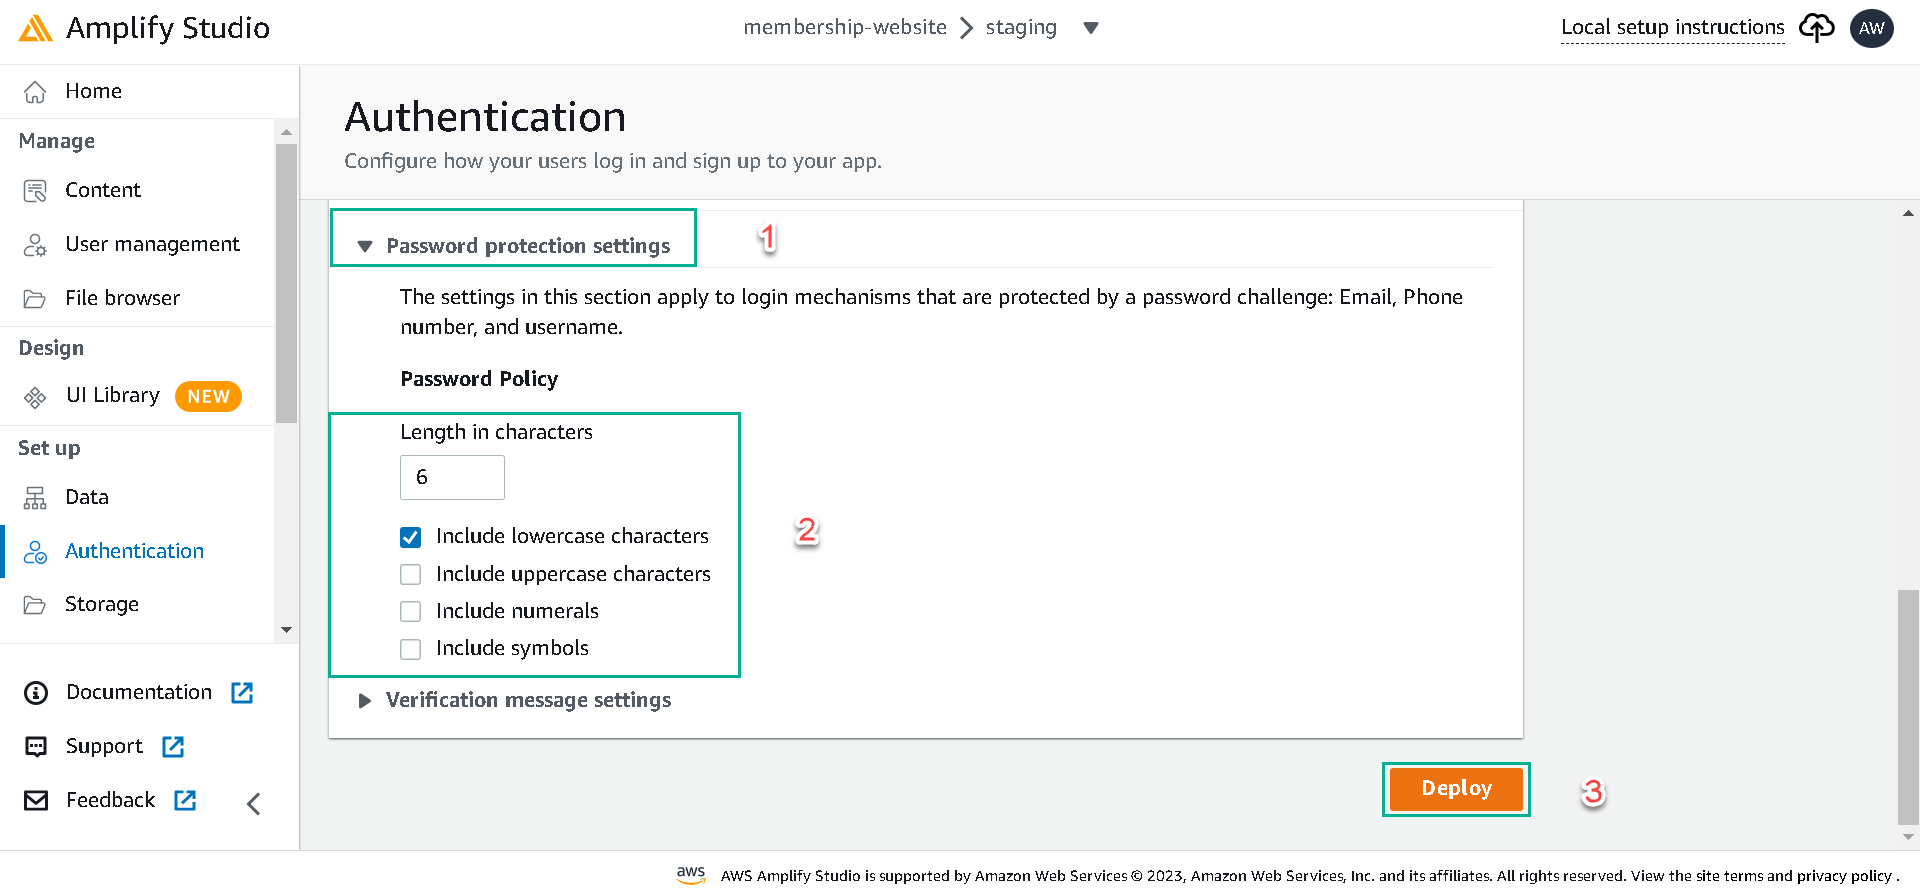
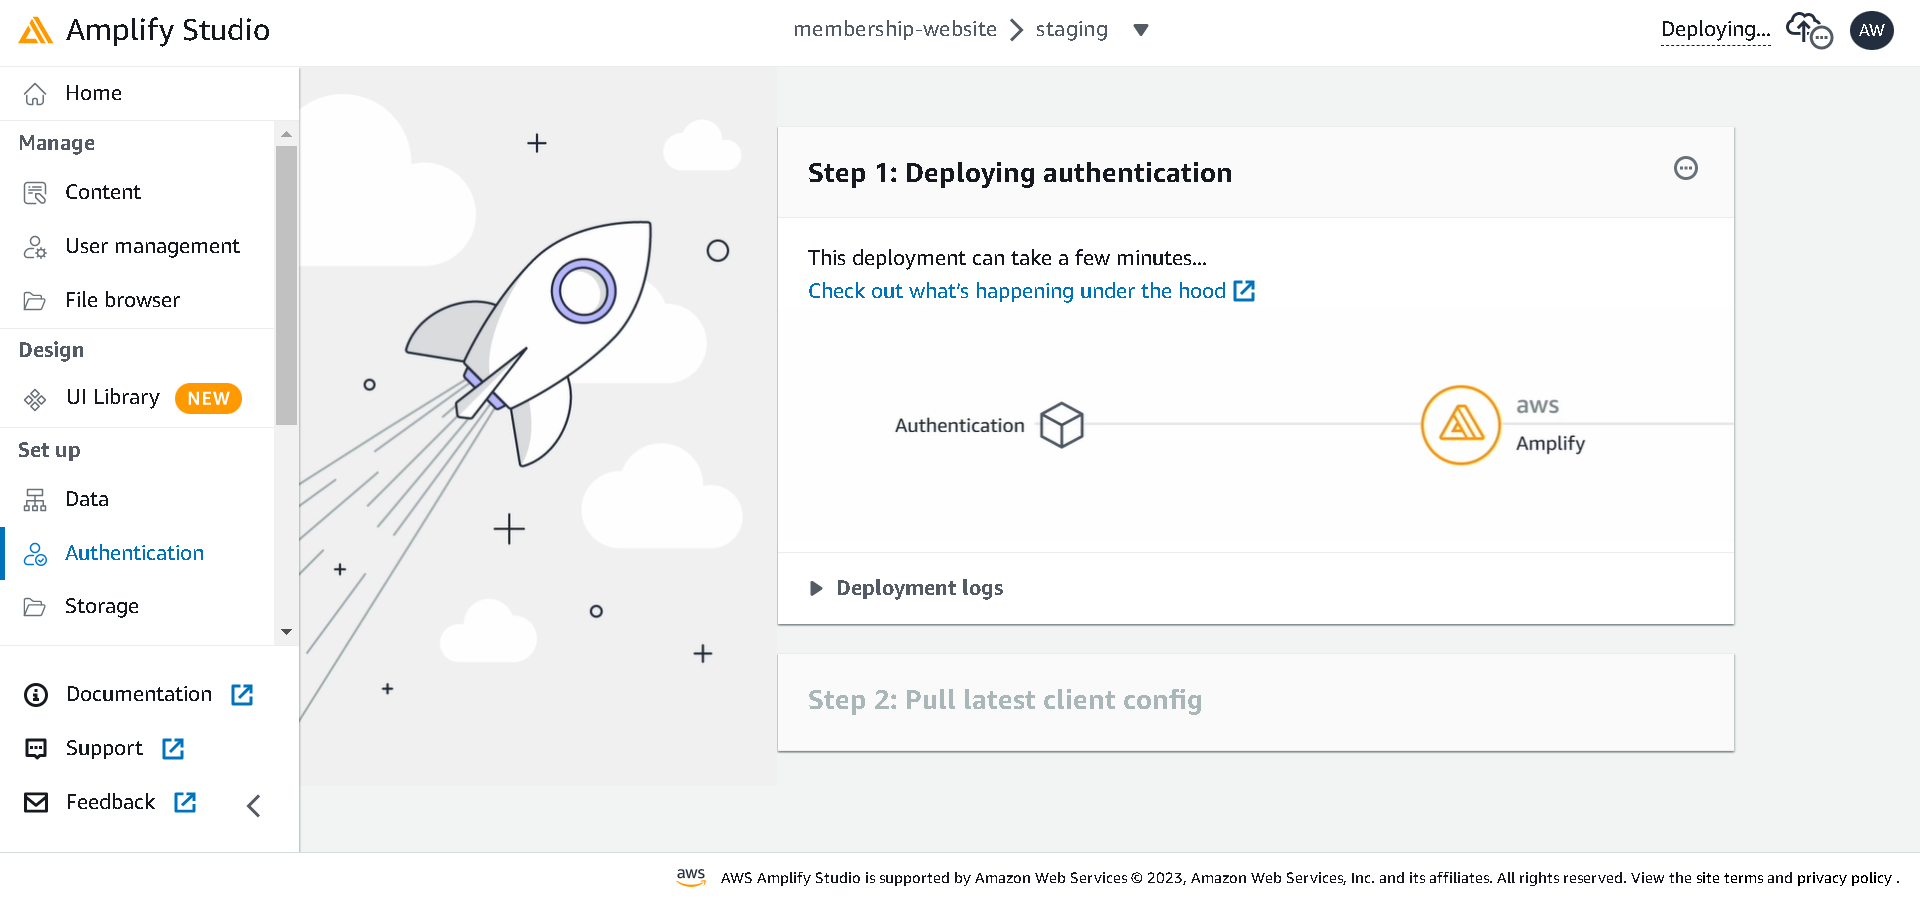
Navigate to the authentication tab since we need only signed-in users to access our content. The login mechanism stays the same; then, in configuring the sign-up section, click the password protection setting and make the password as strong or weak as possible.
Uncheck all other checkboxes except the Include lowercase characters checkbox and click Deploy to deploy the authentication.
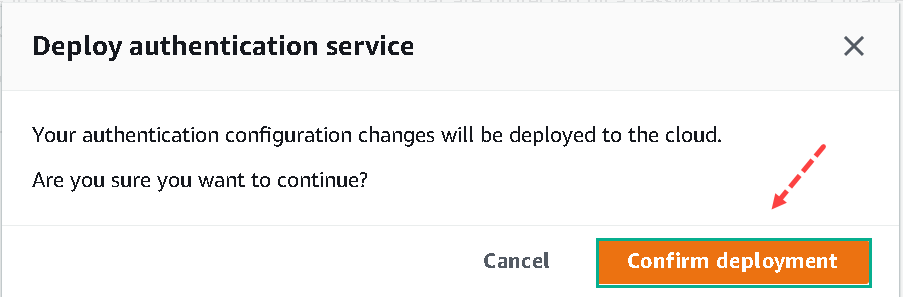
Next click in Confirm deployment
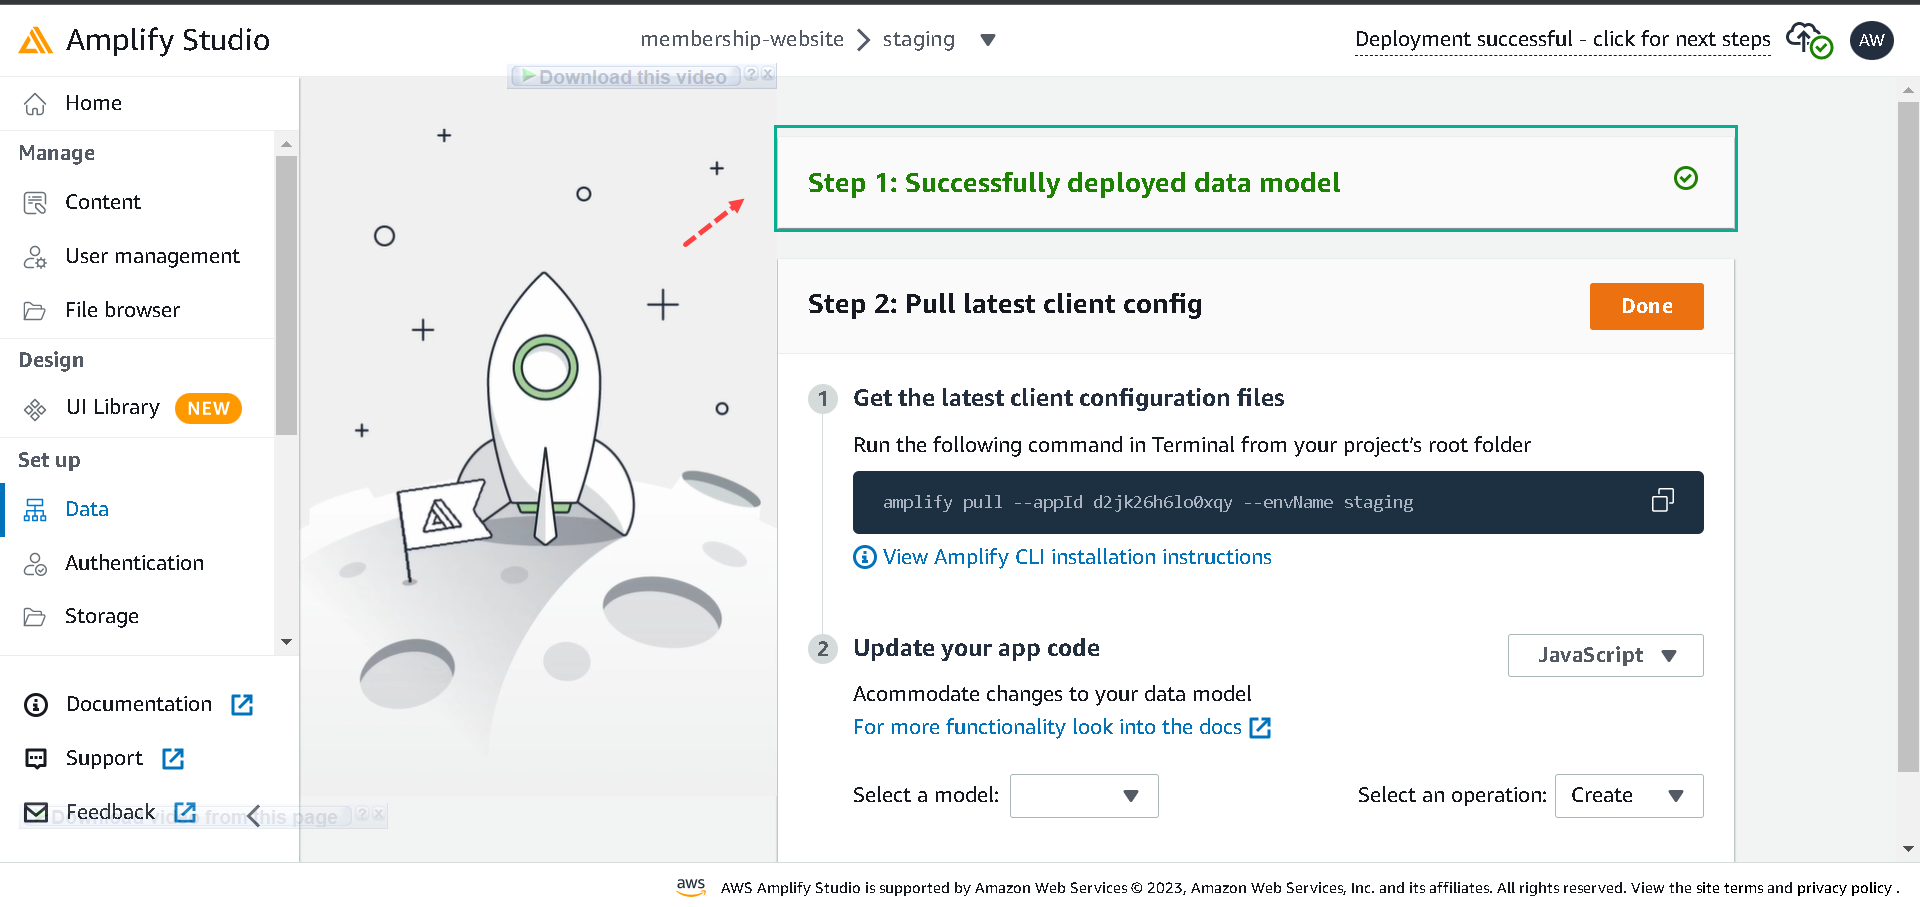
This deployment can take a few minutes
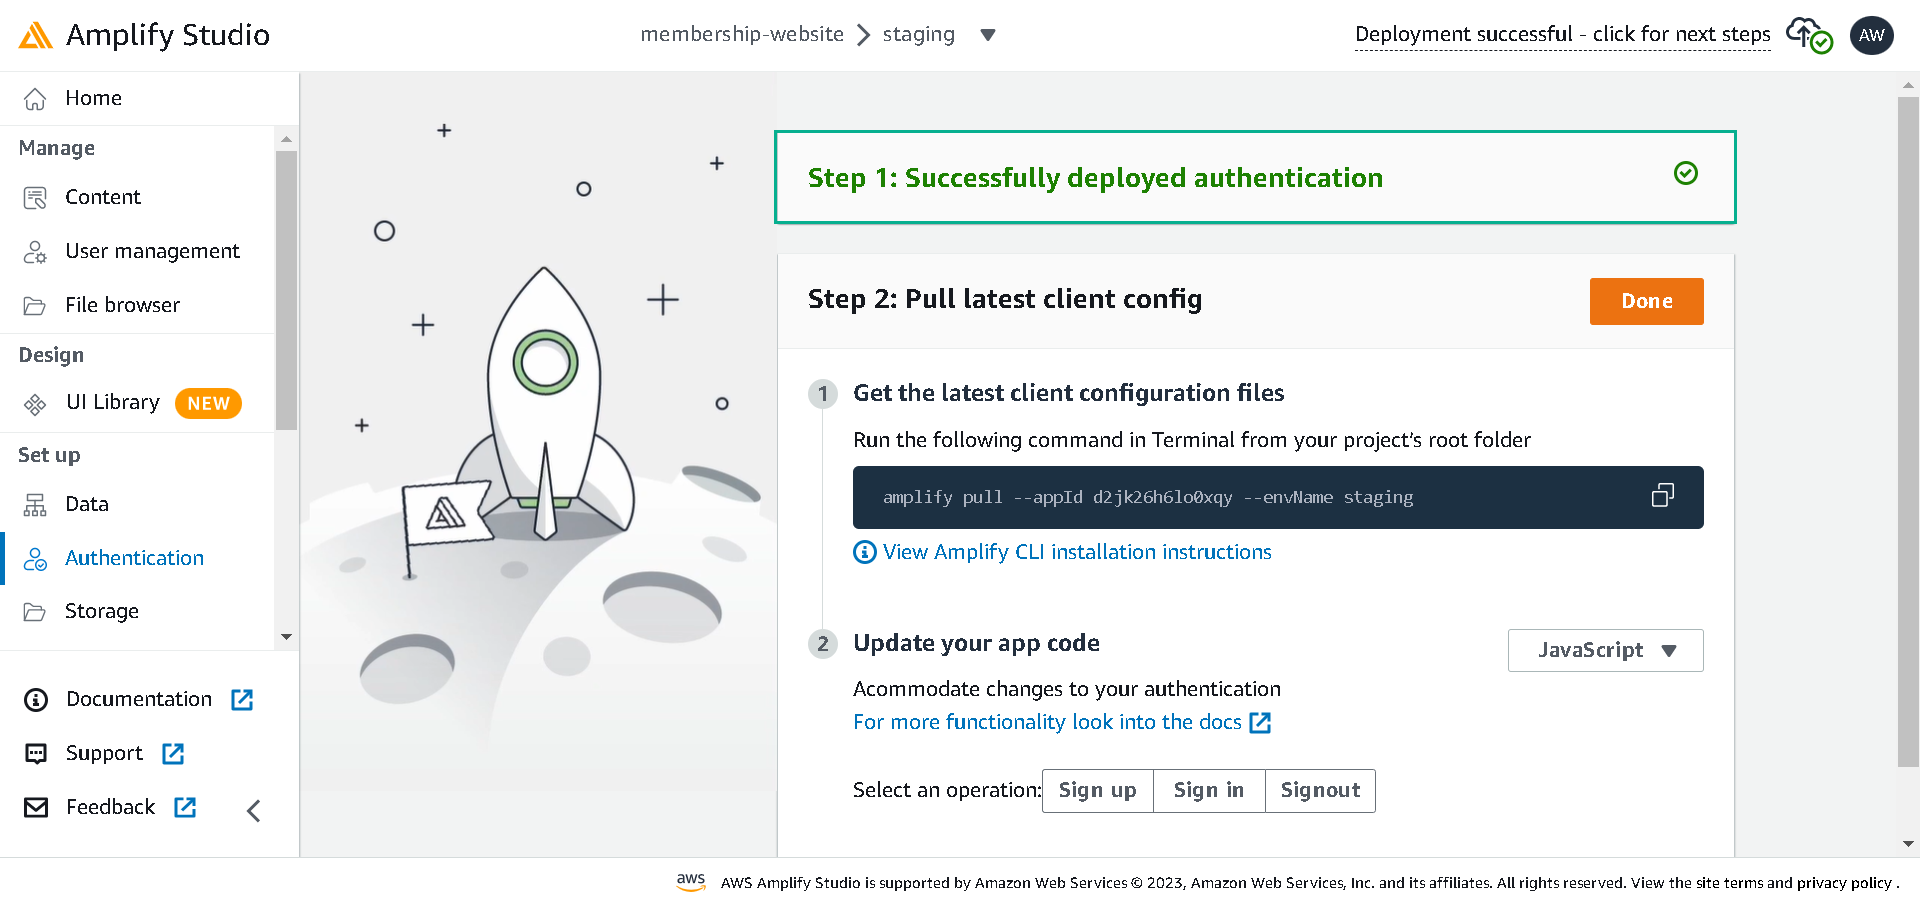
If successfully it will show
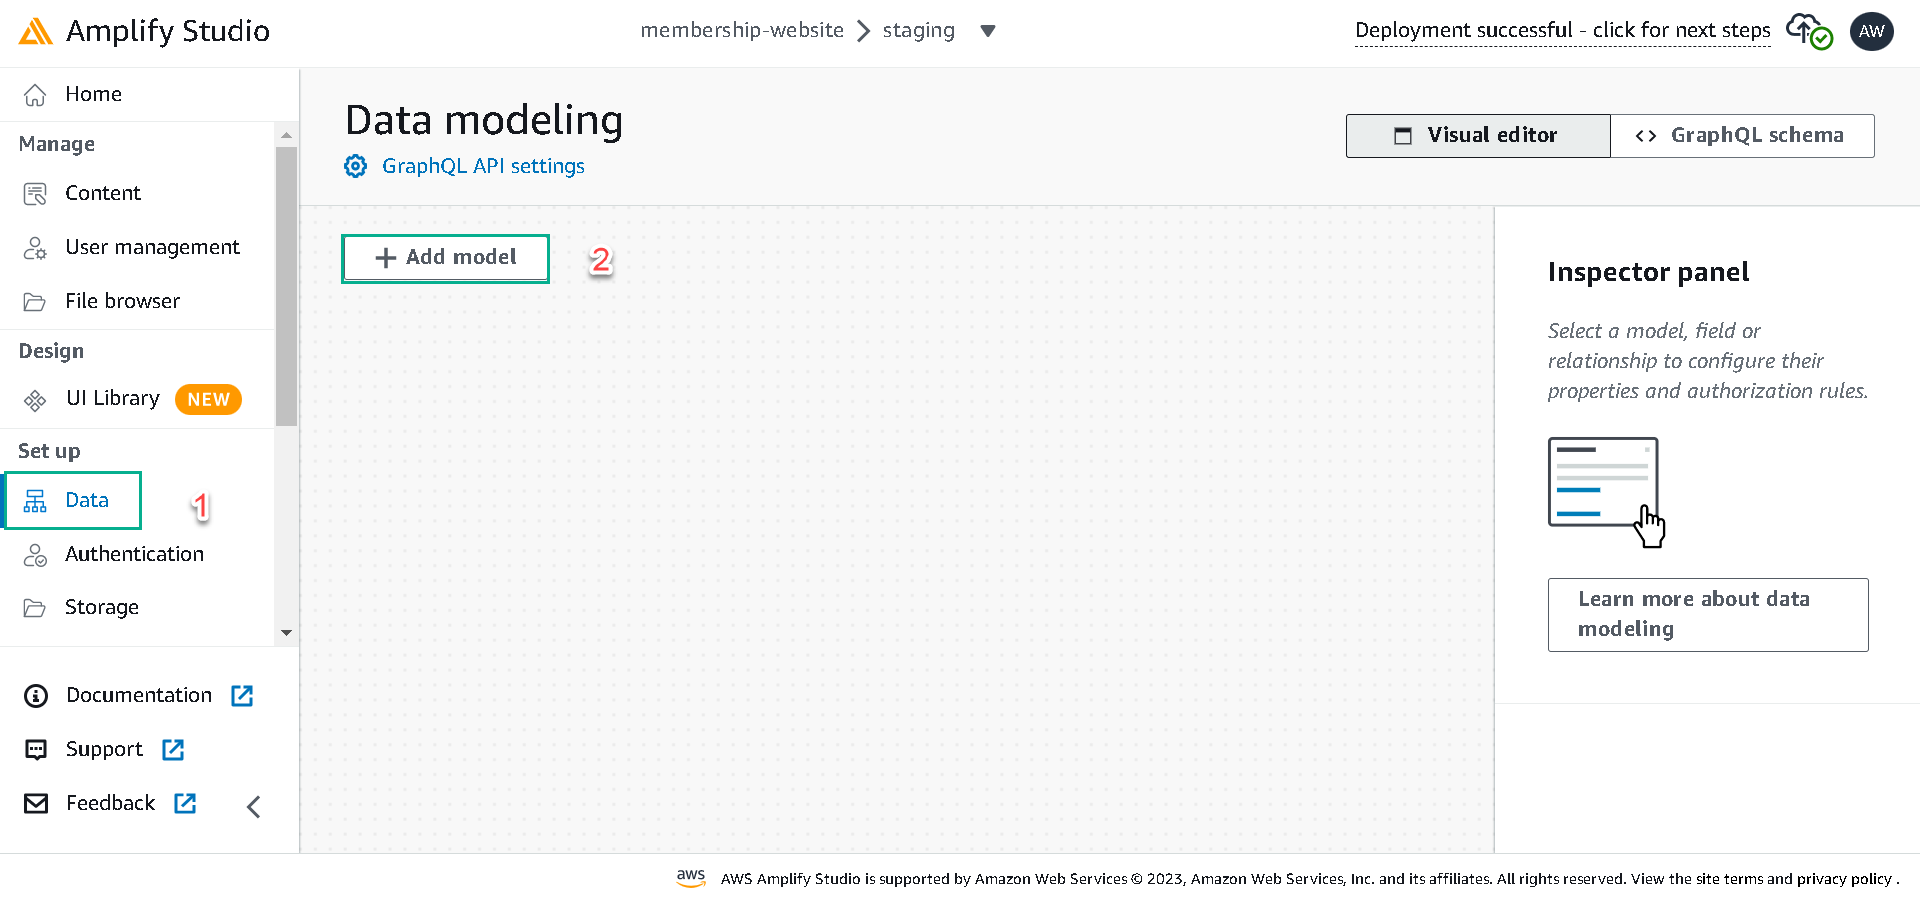
Creating Data Model
Navigate to the data section and create the following data models:
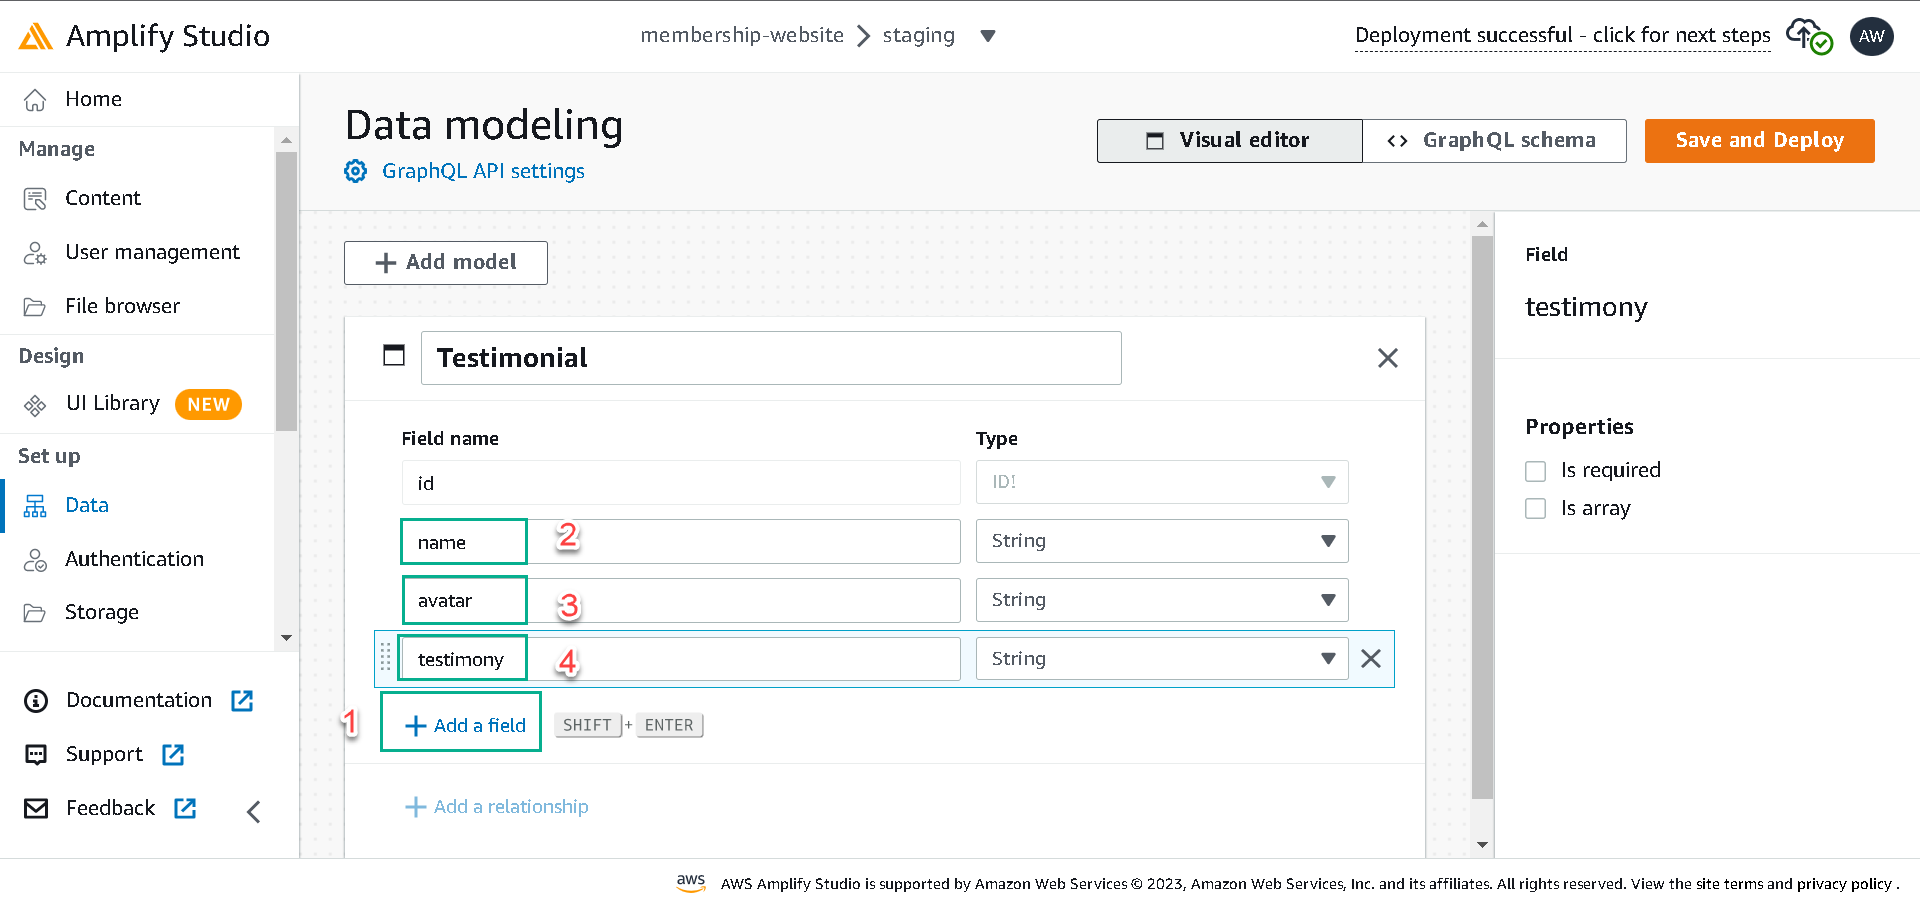
Testimonial - this will have the id, name, avatar, and testimony fields.
Post - this will have the id, title, body, and description fields and also a readTime field with the type of integer.
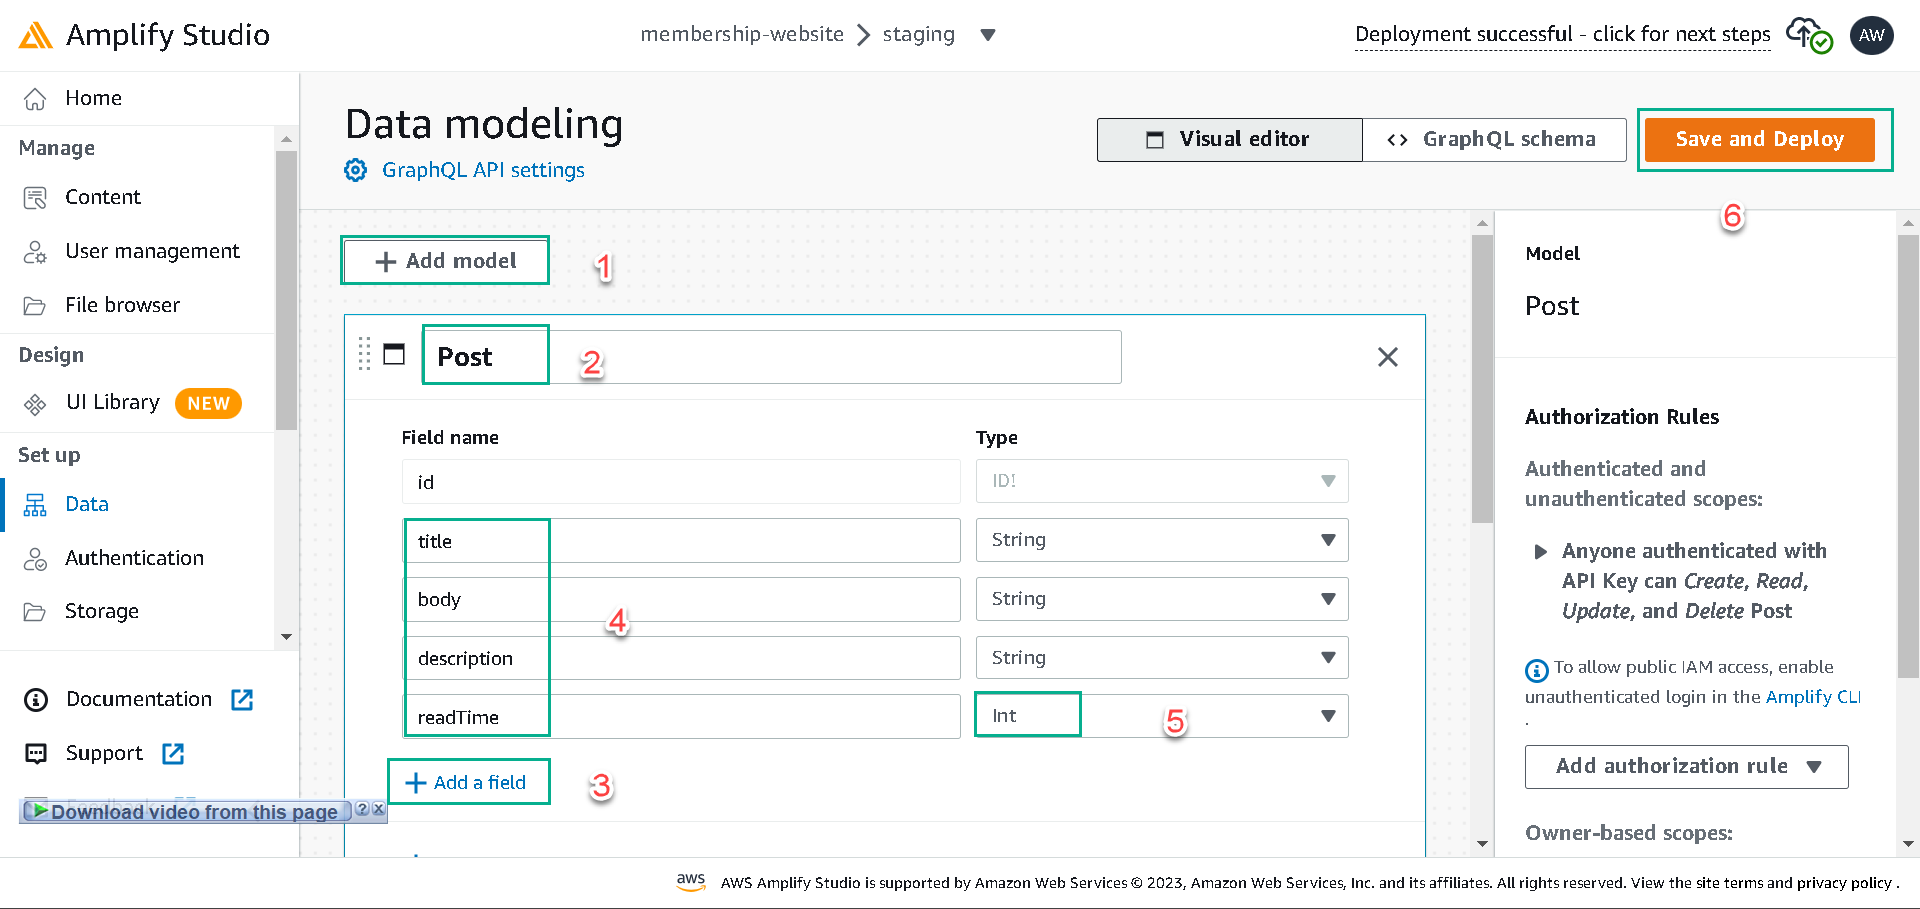
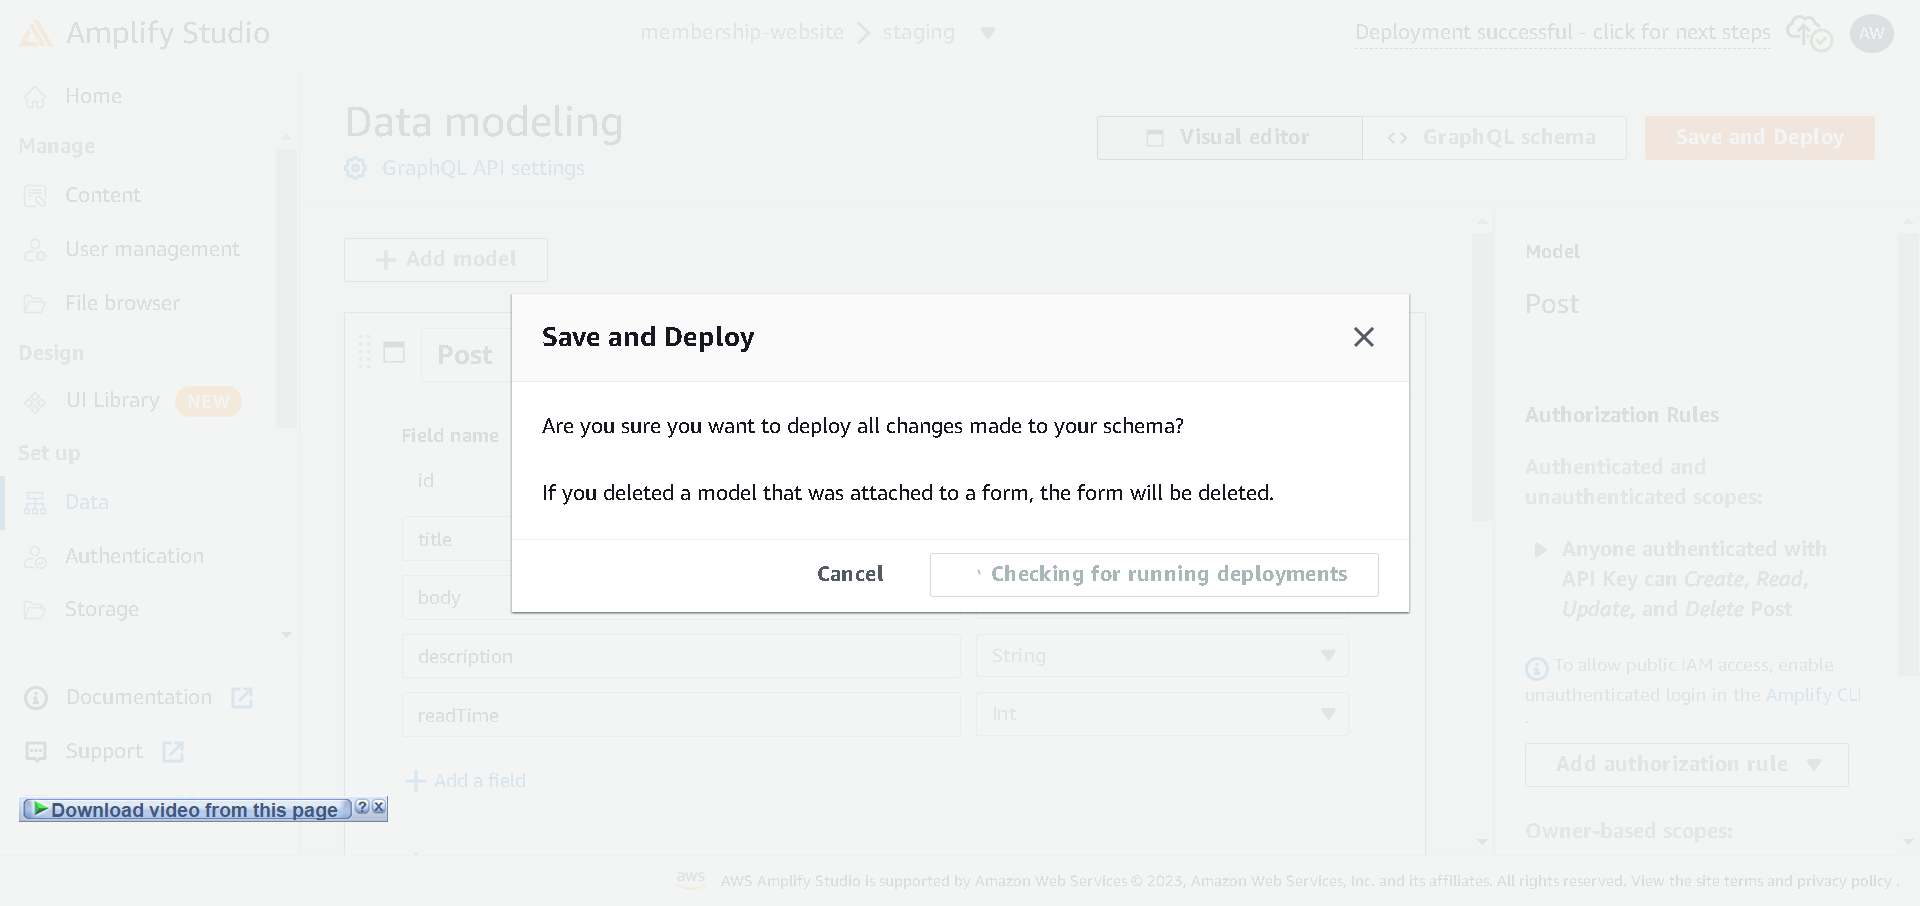
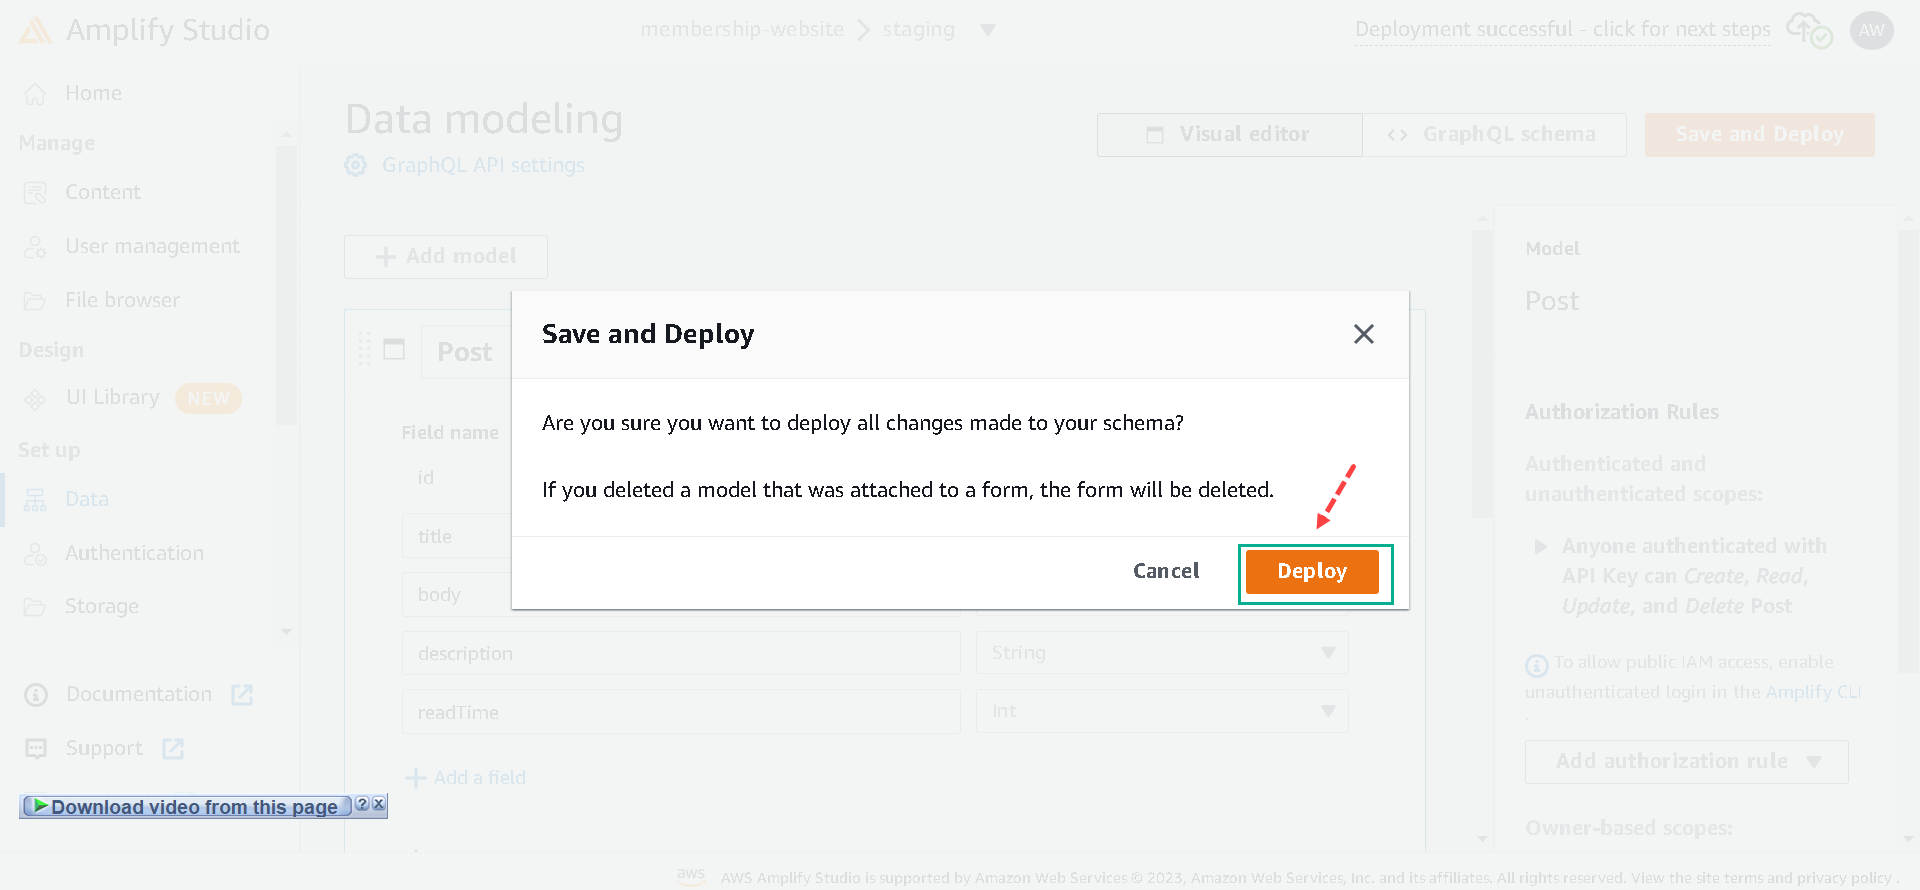
After creating the models and adding fields click the Save and Deploy button to deploy the database.
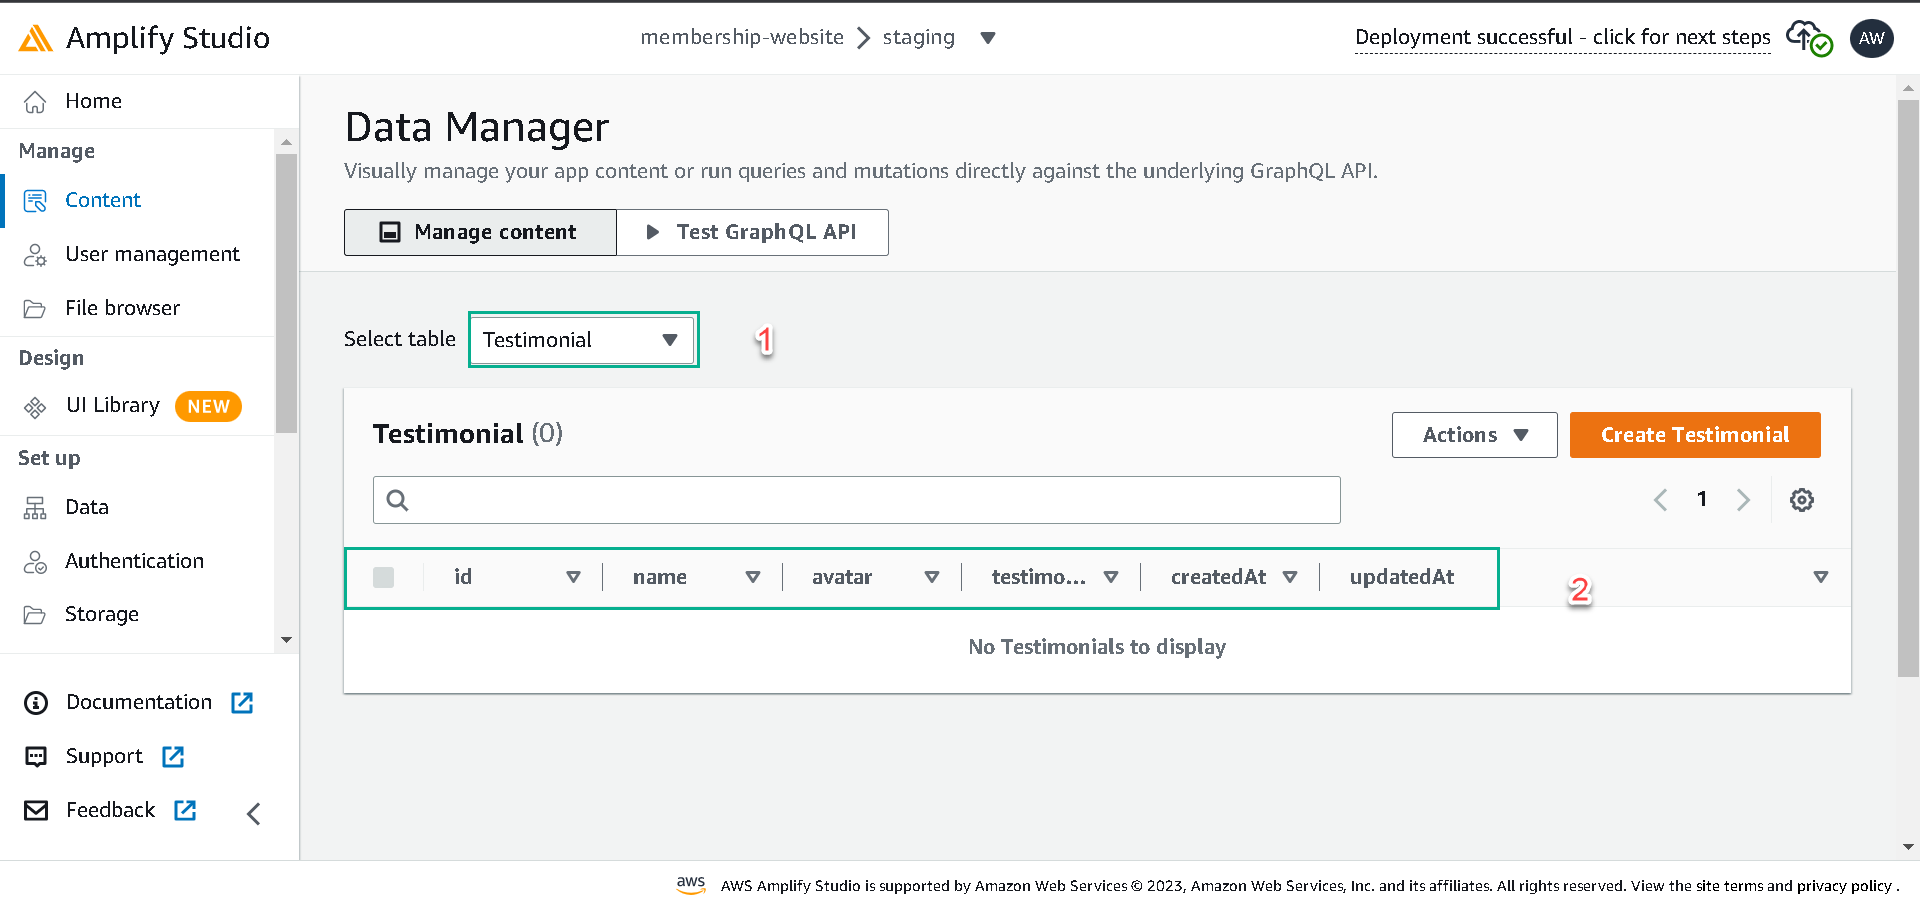
Adding Content to the Data Model
Add this page we will see

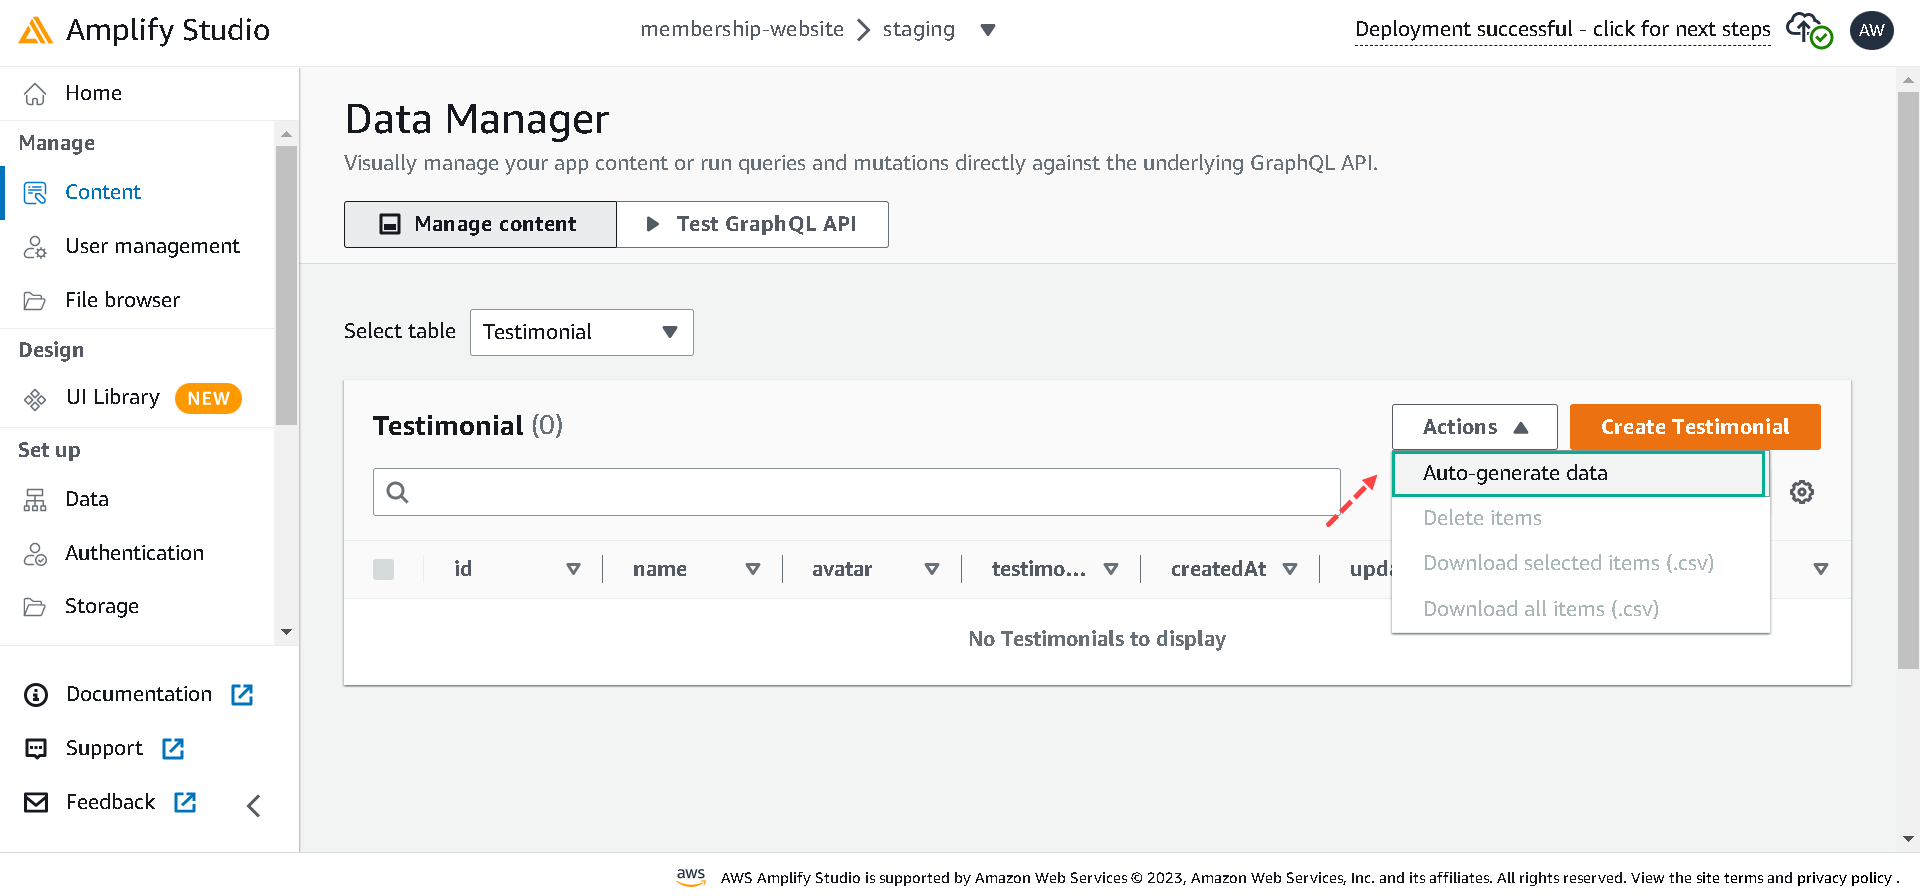
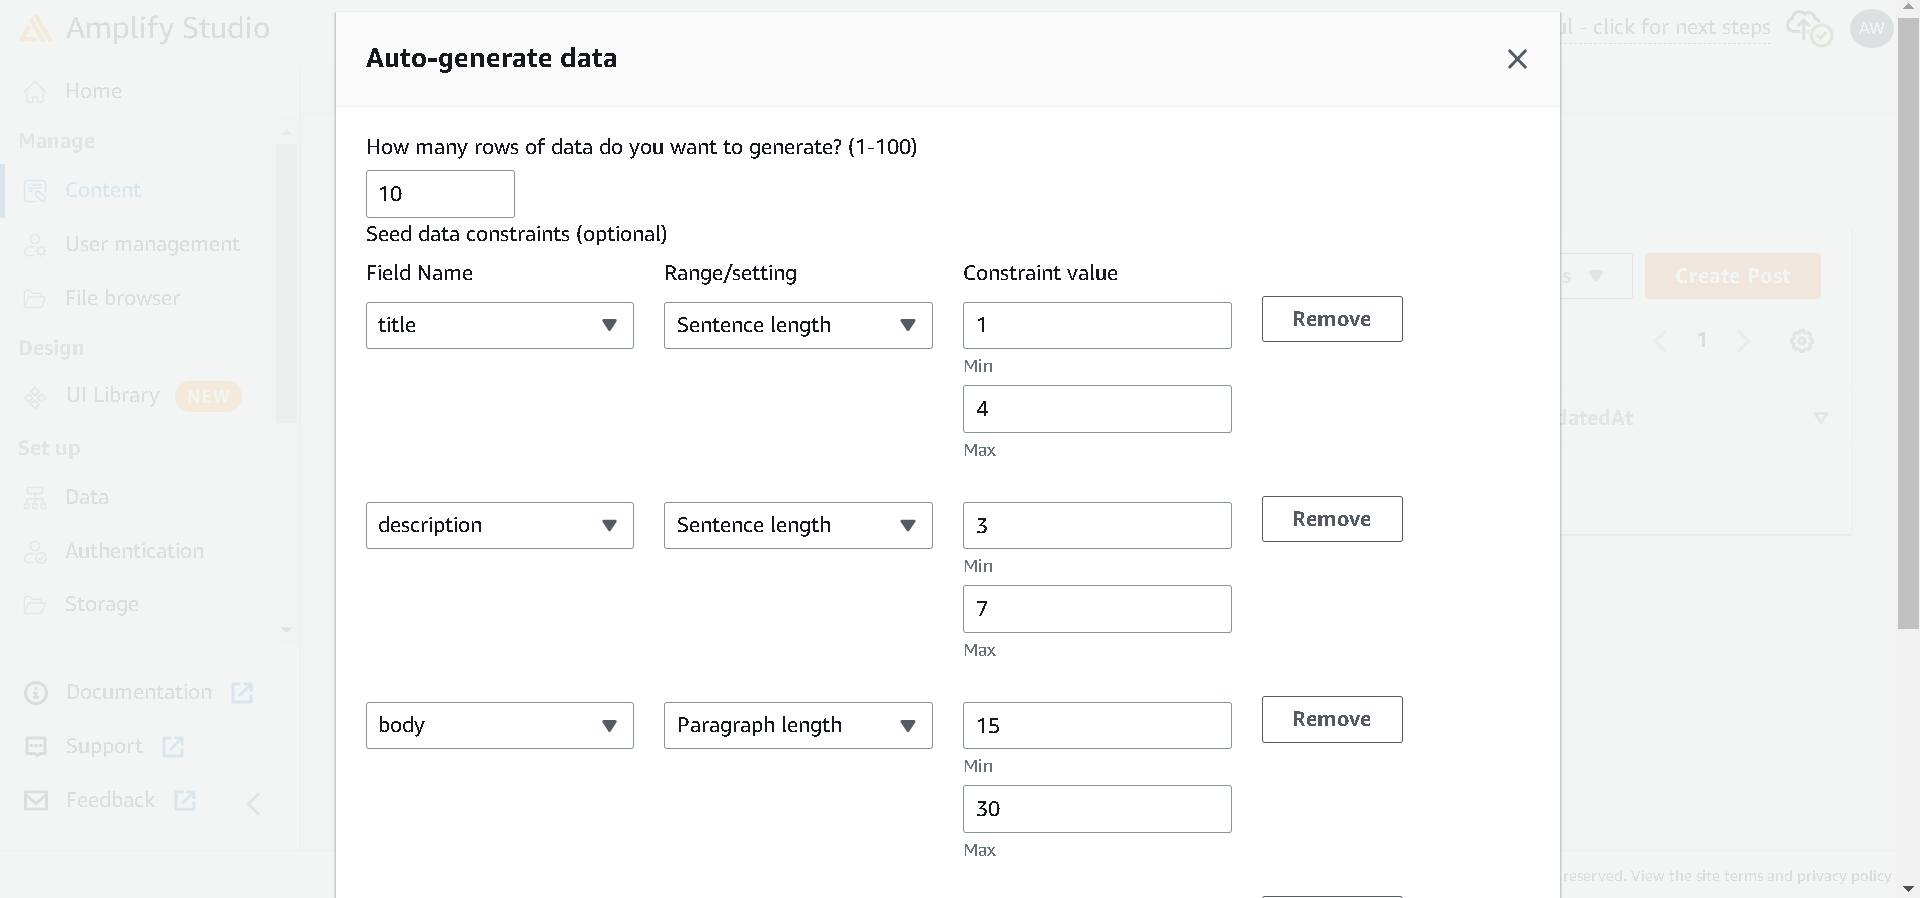
Navigate to the content section, select either the Testimonial or the Post table from the select table dropdown, and click on Auto-generate seed data.
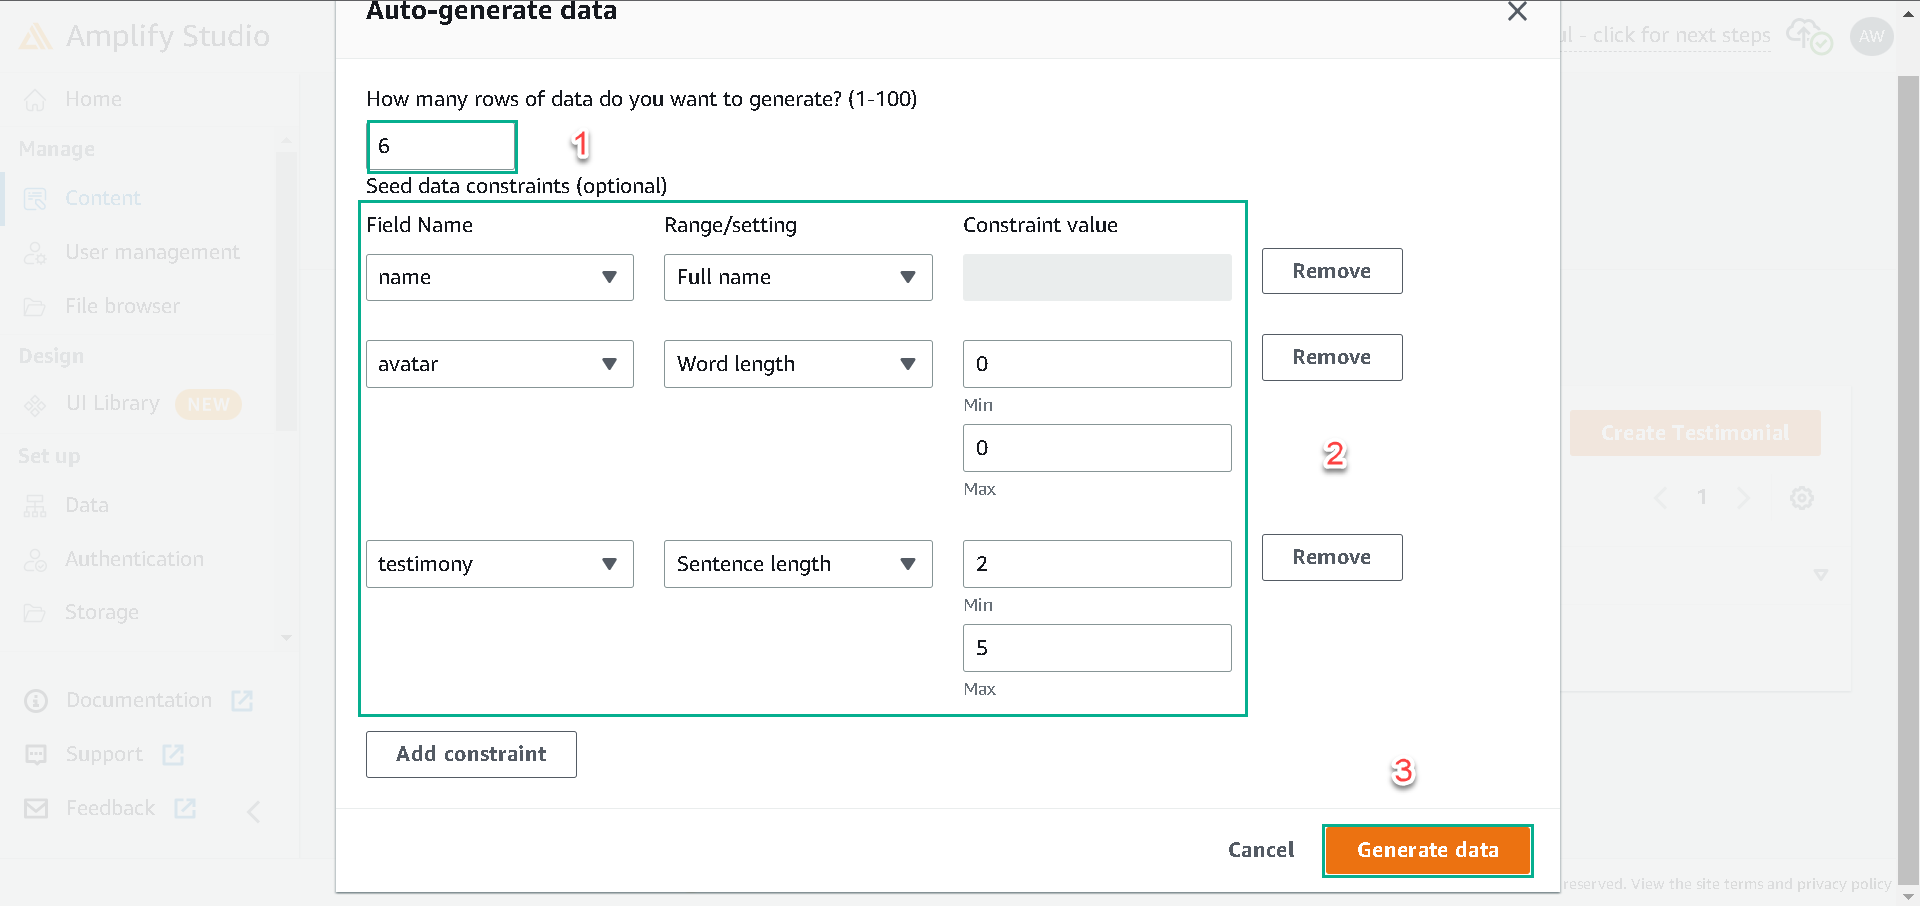
For the Testimonial table, set rows to 6, add constraints like in the below and click the Generate data button:
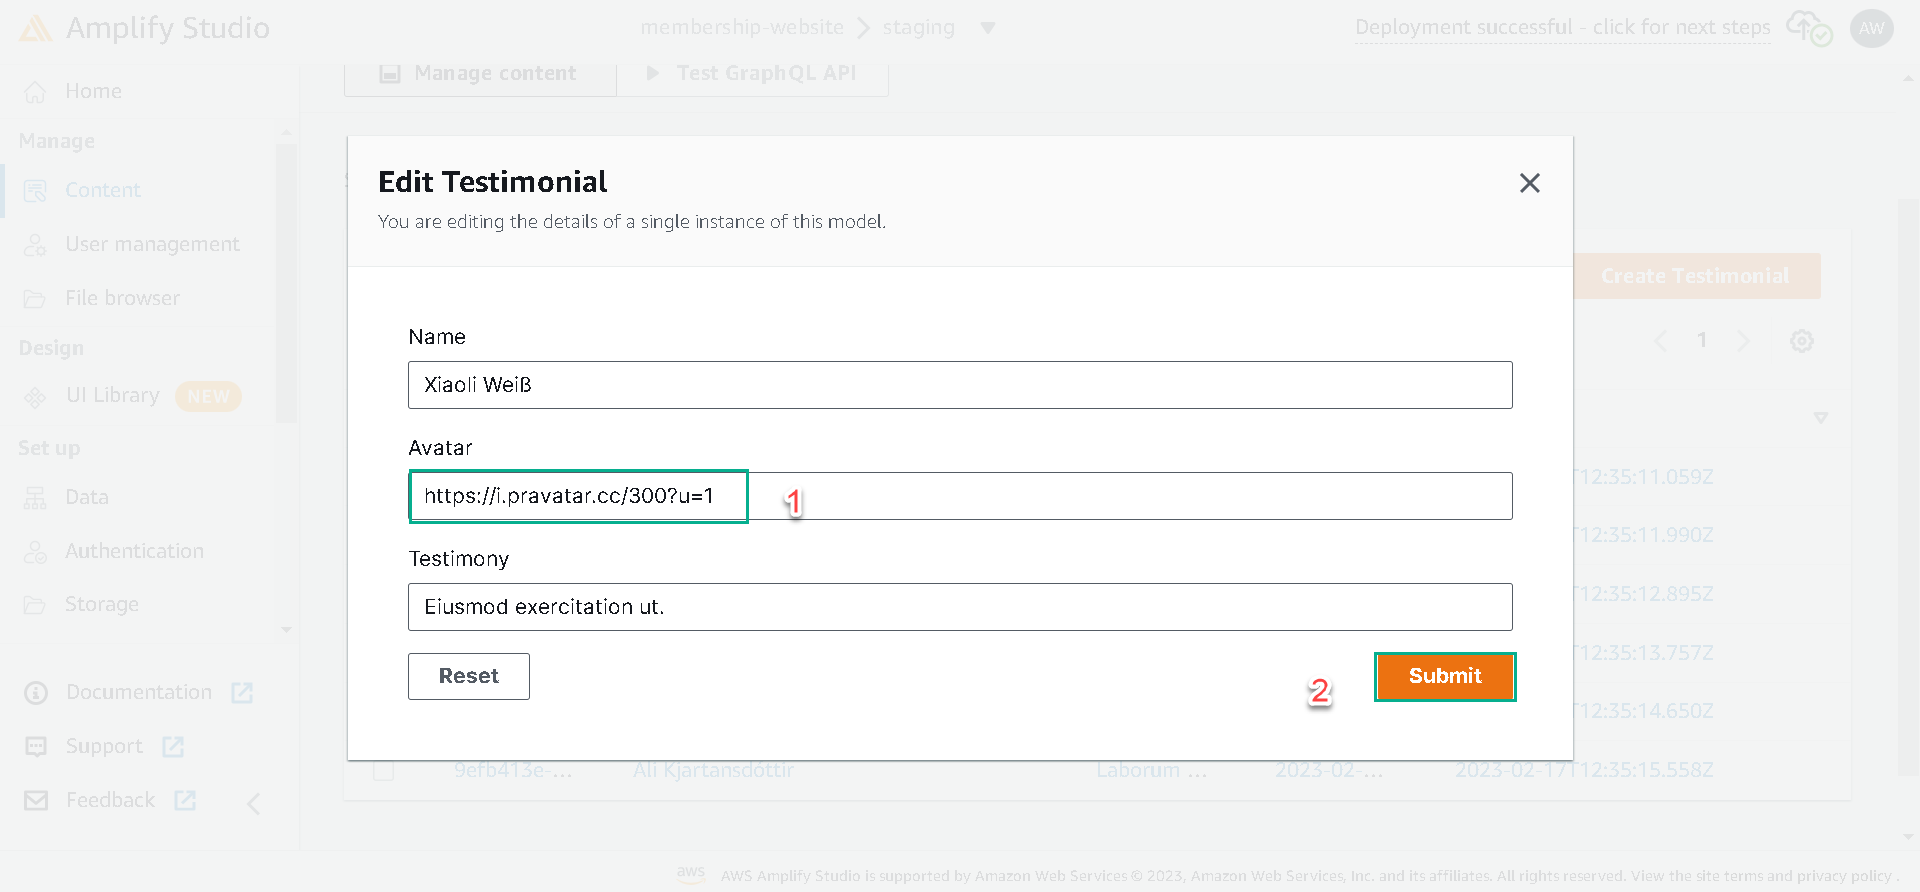
After generating the data, we can then update the avatar fields with desired avatar URLs.
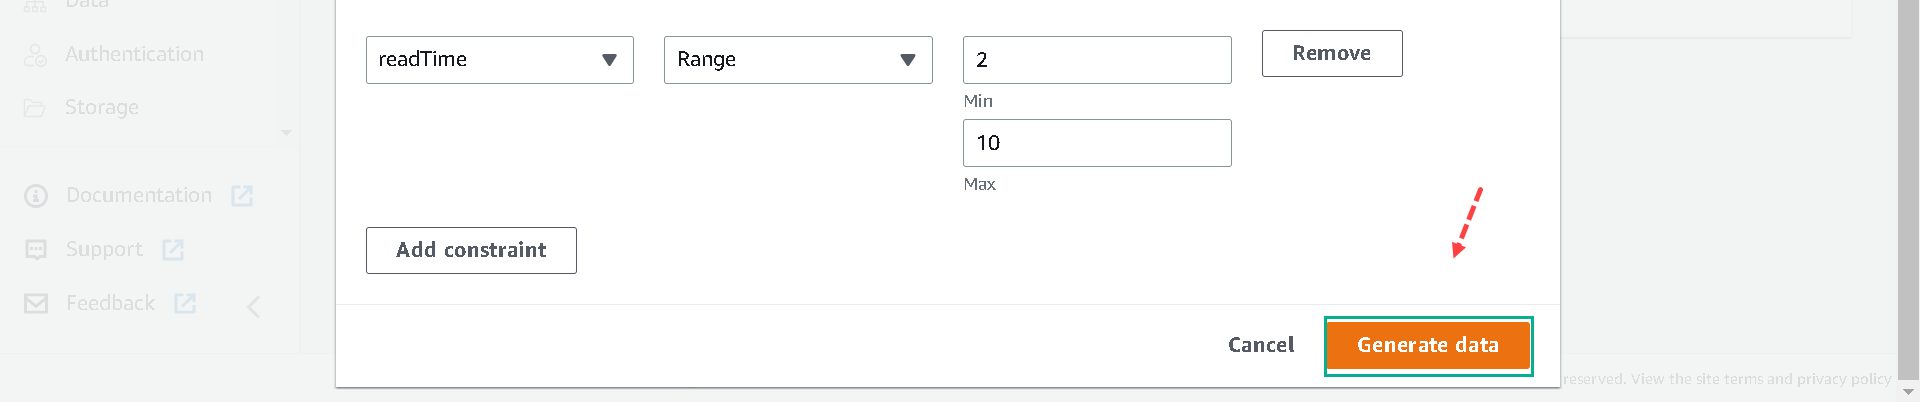
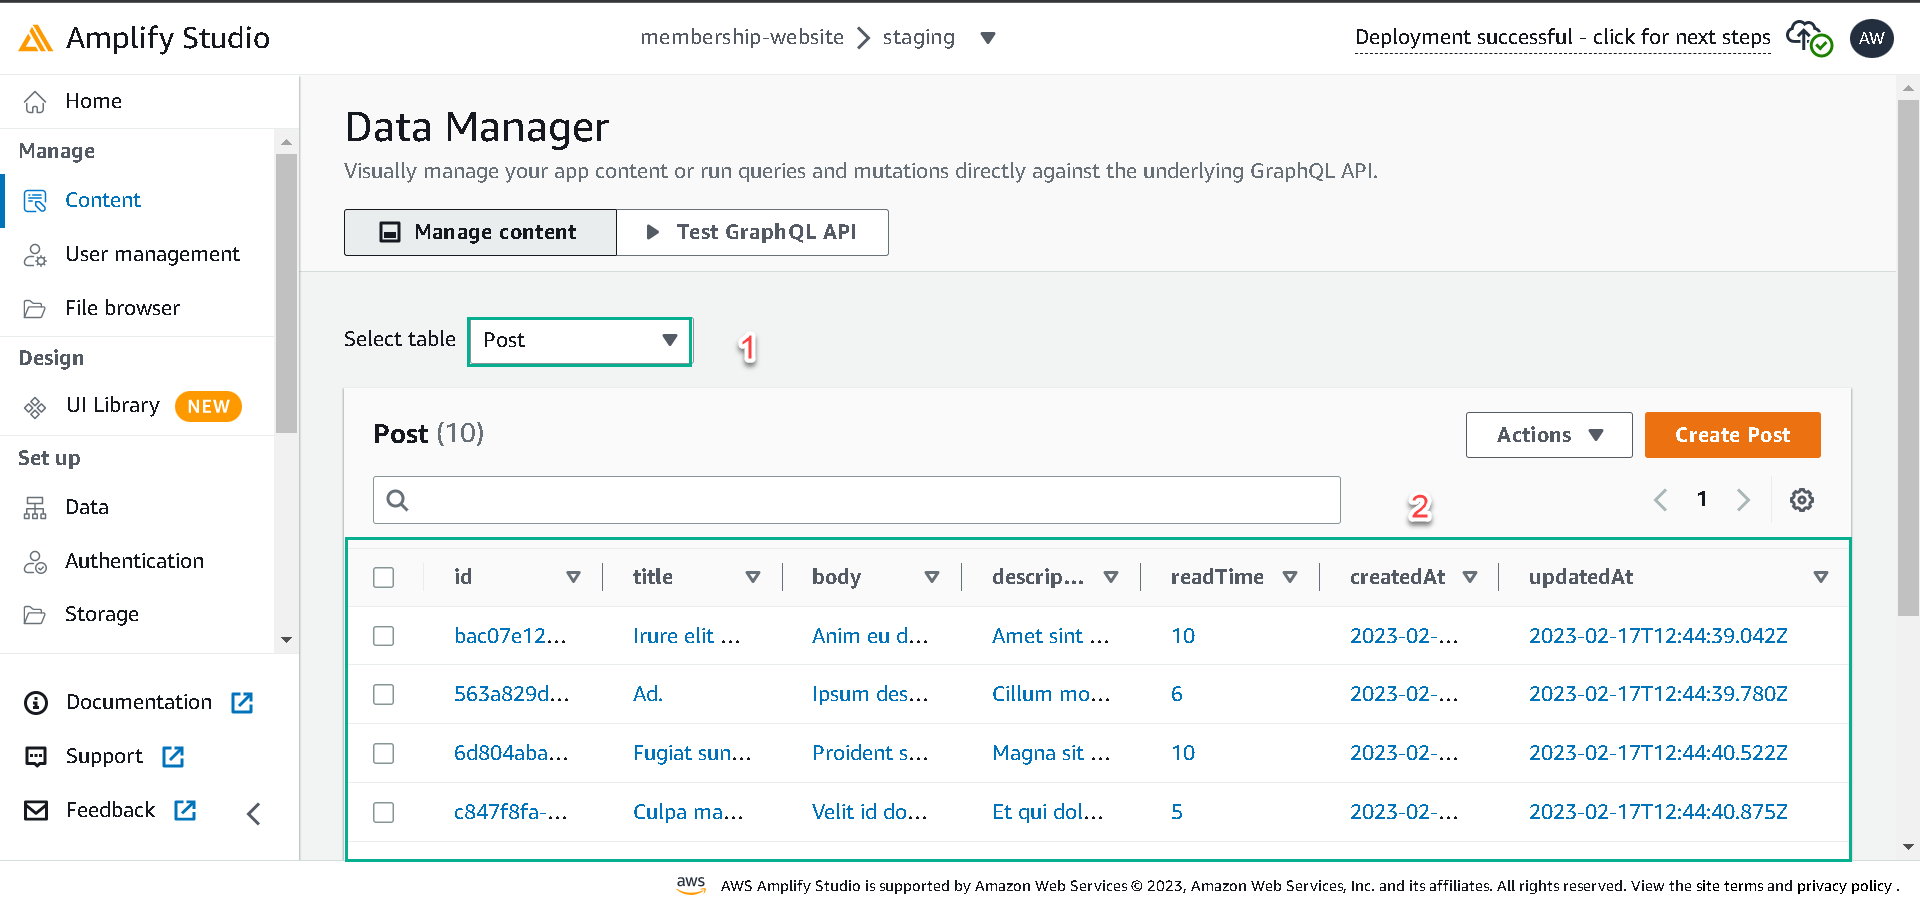
Set the rows to 10 for the Post table, add constraints, and click the Generate data button to seed the table.
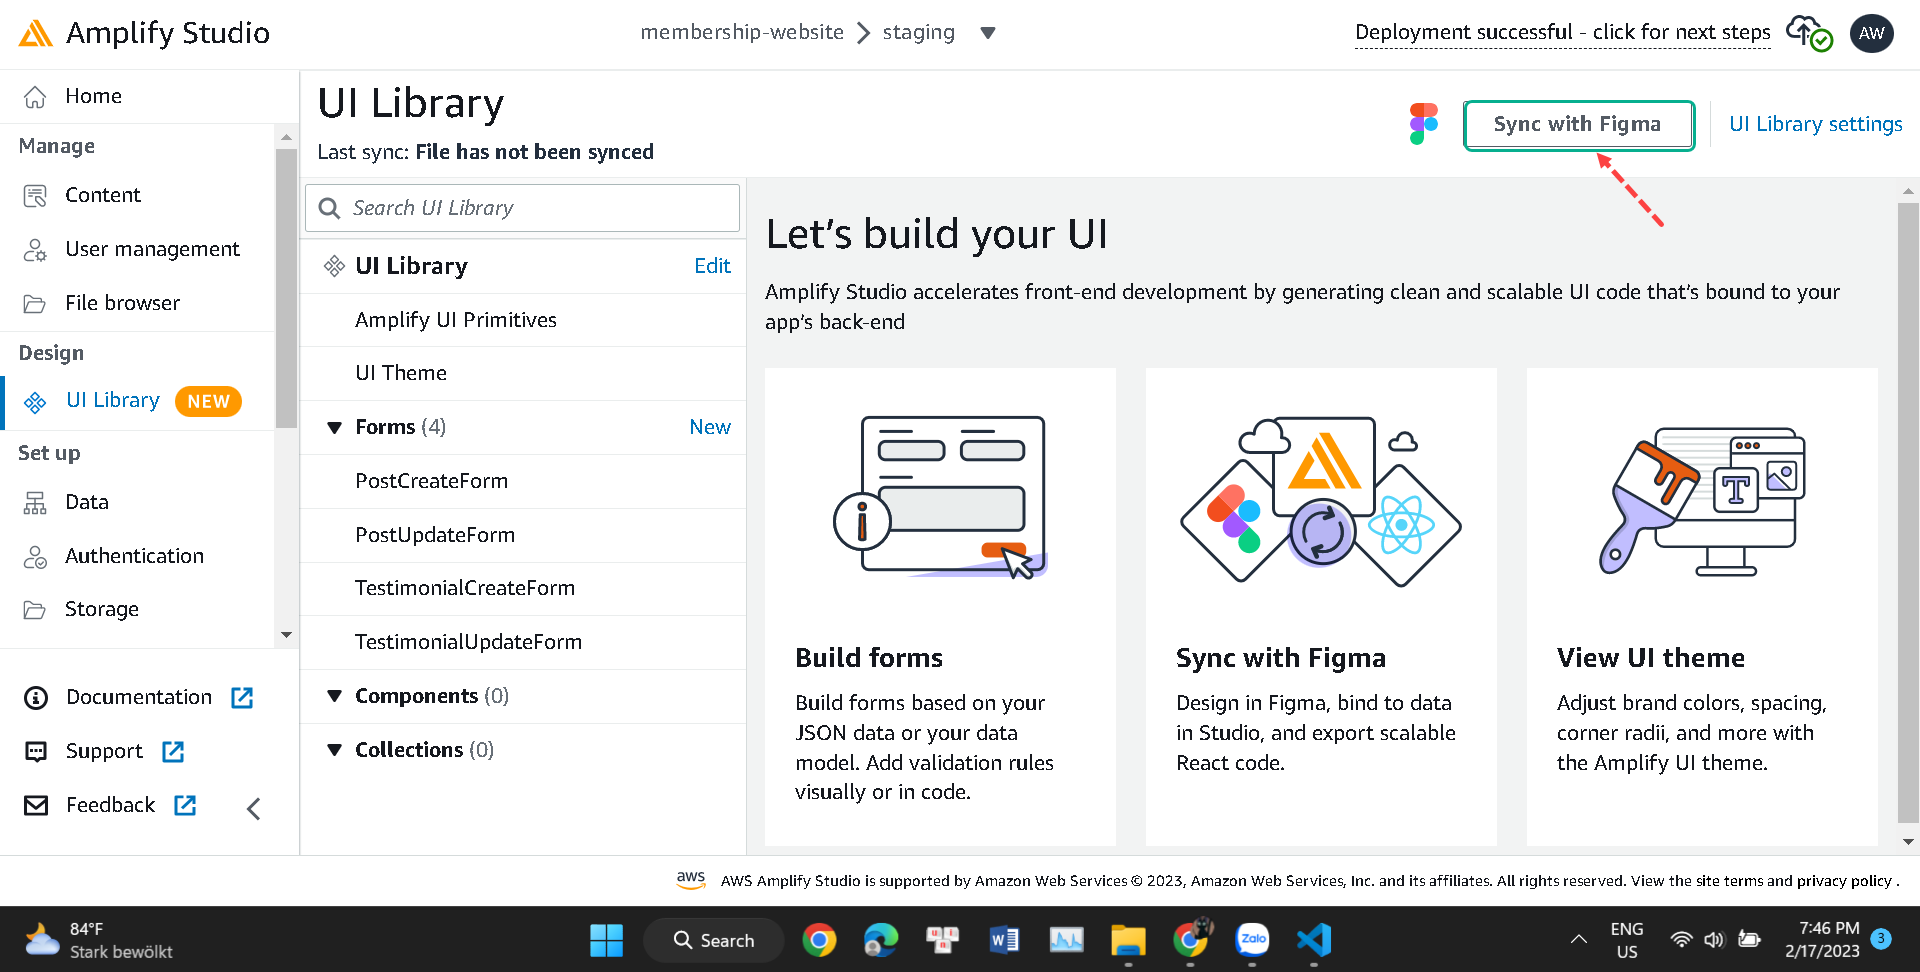
Importing UI Components from Figma
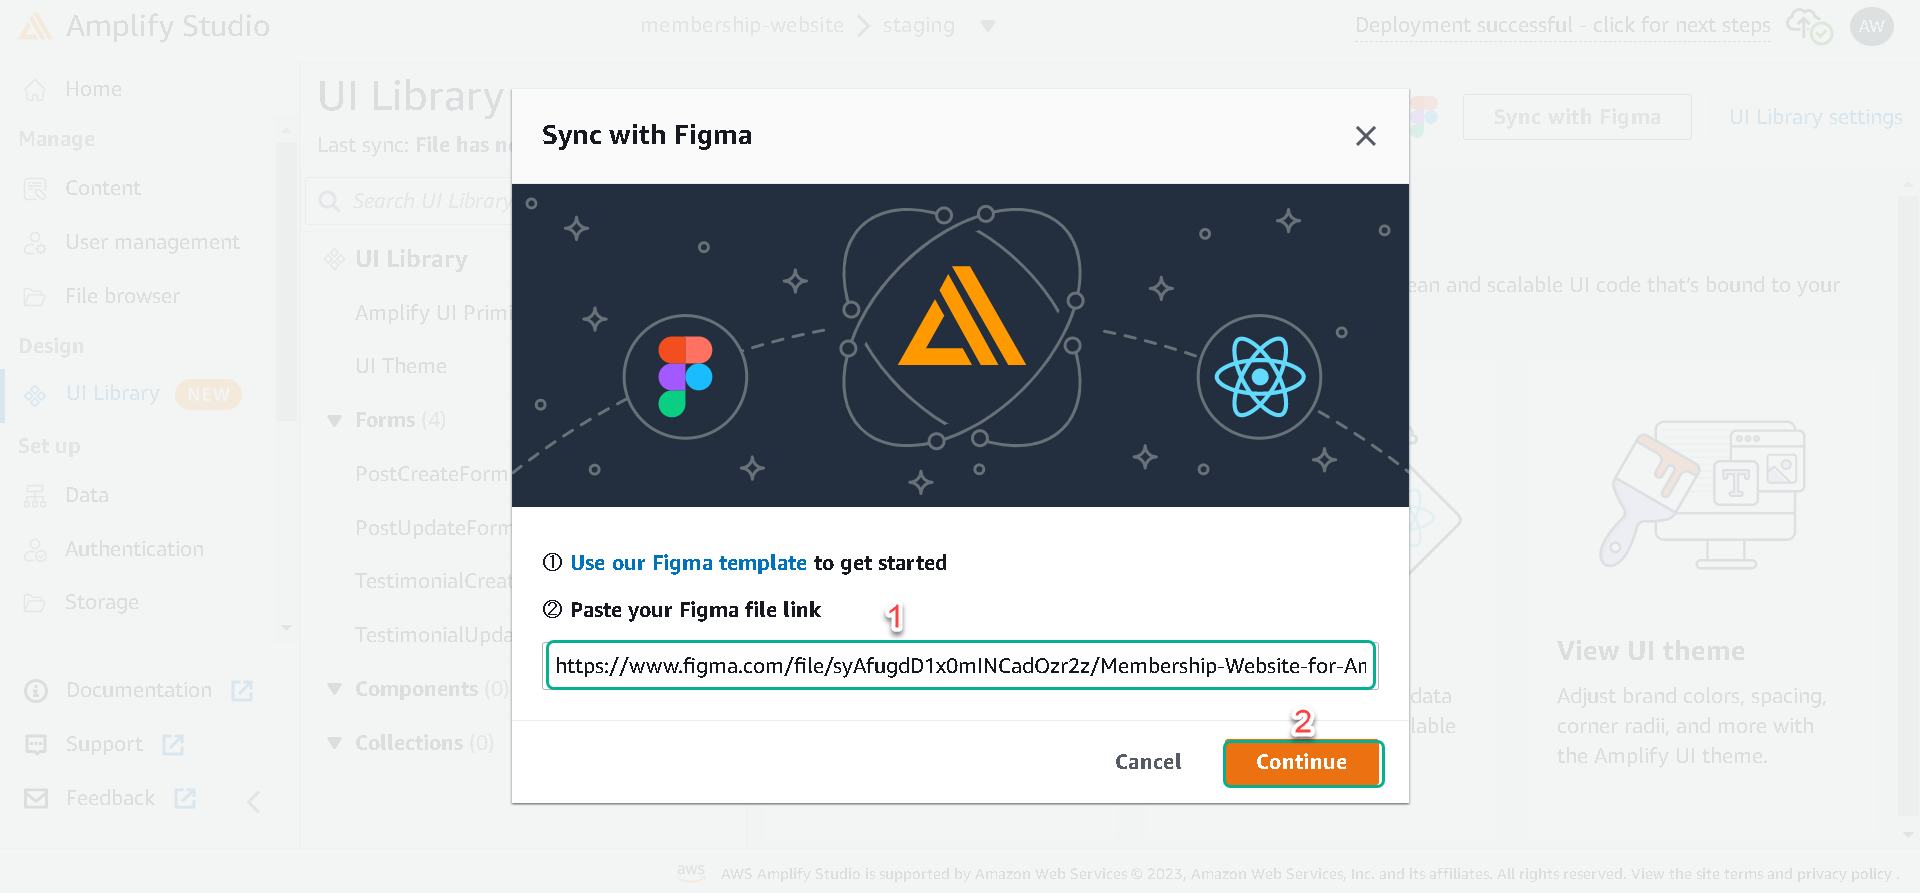
We’ll import the customized design from Figma into Amplify Studio, grab the URL from Figma, and navigate the UI Library tab.

Next, click the Get Started button and paste the Figma design URL in the input field and click on Continue.
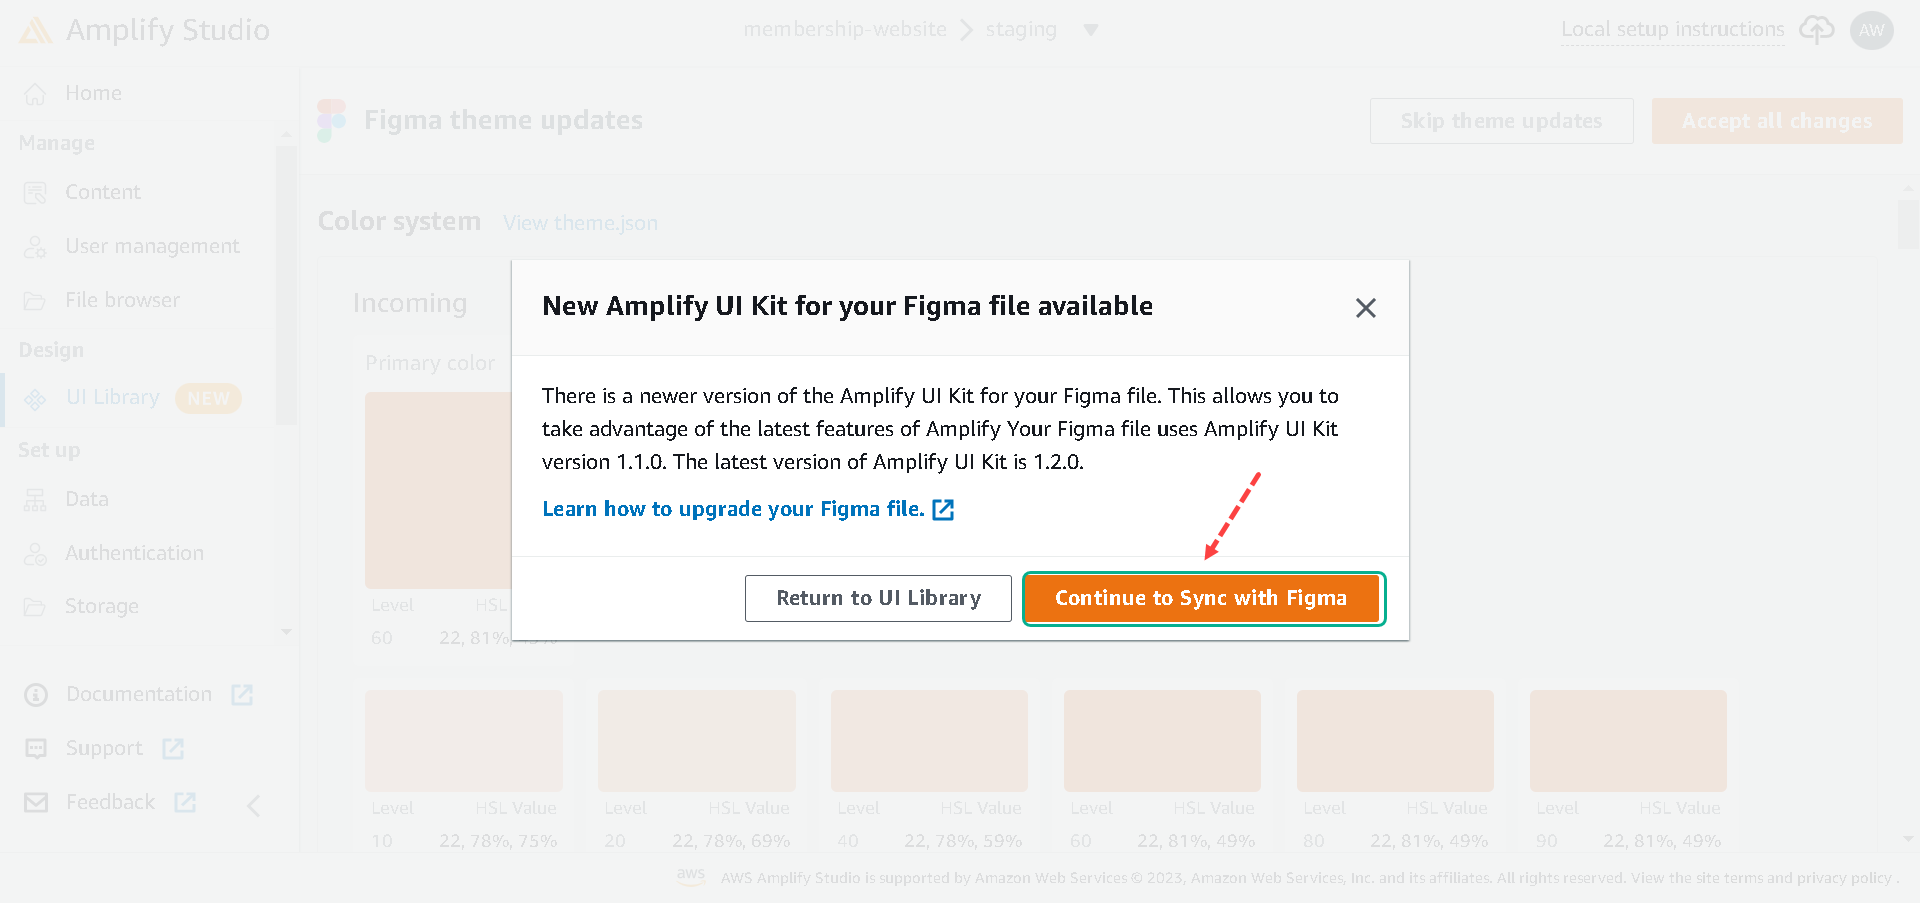
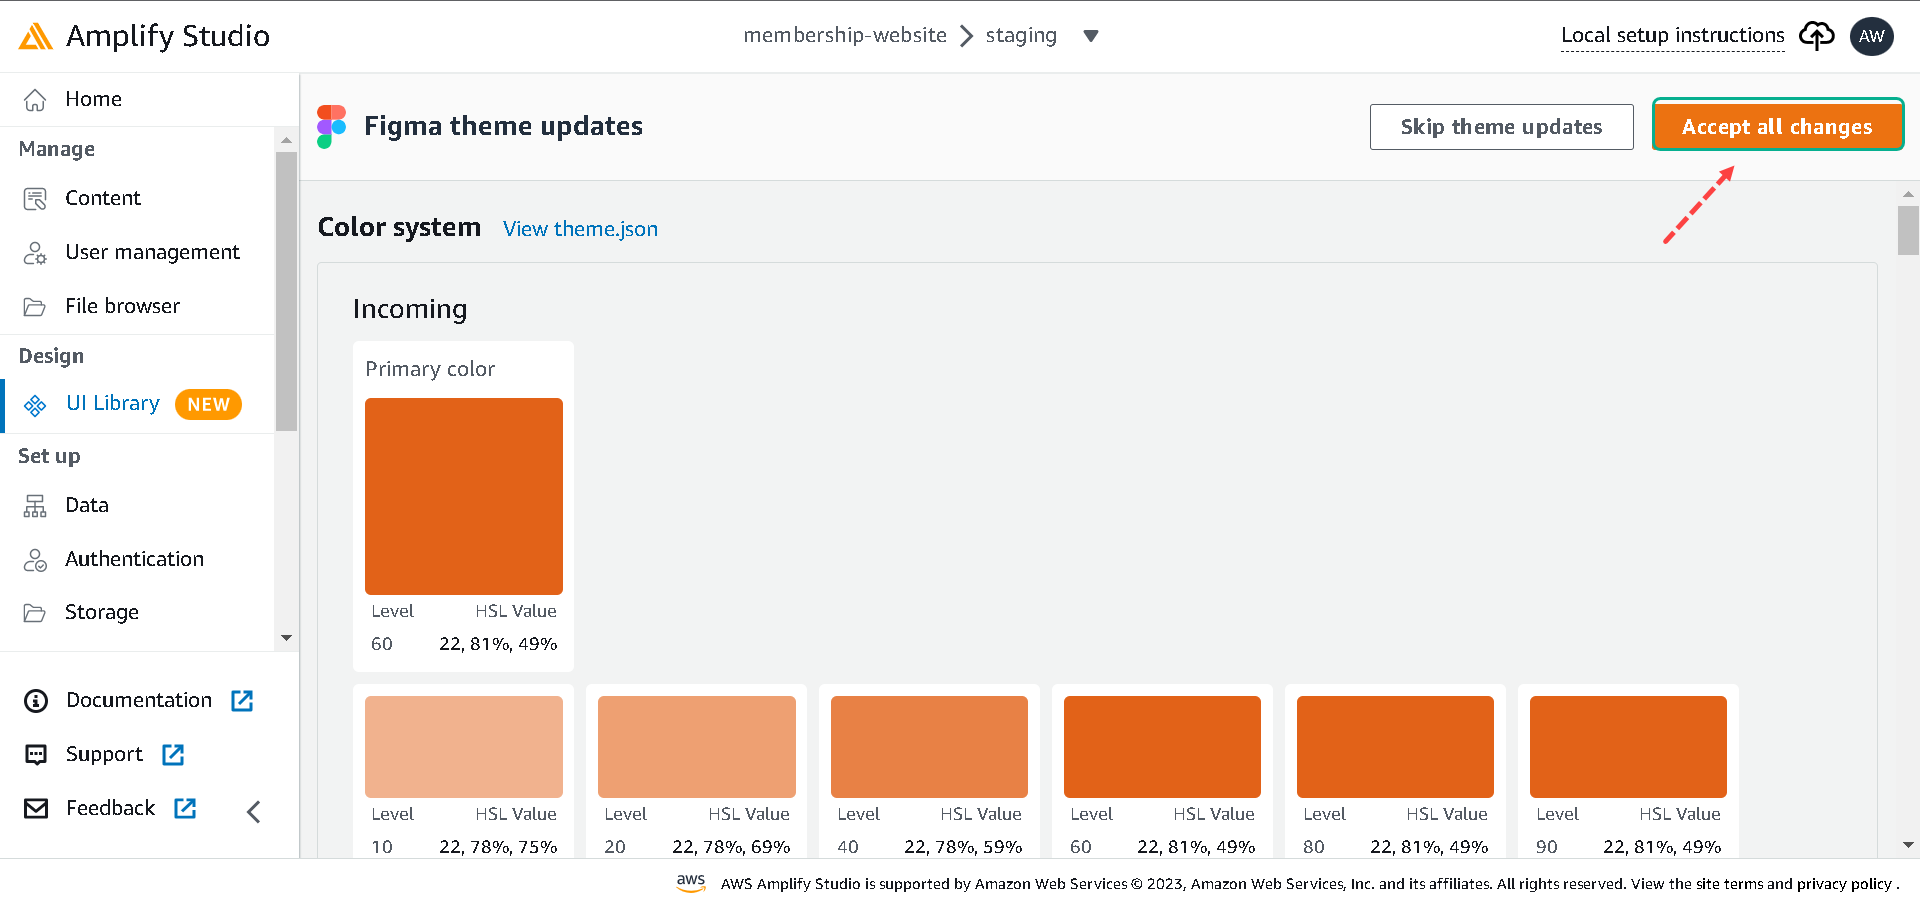
After successfully importing the Figma components, click on Accept all changes.

Next, click on Accept all to accept all the imported components.
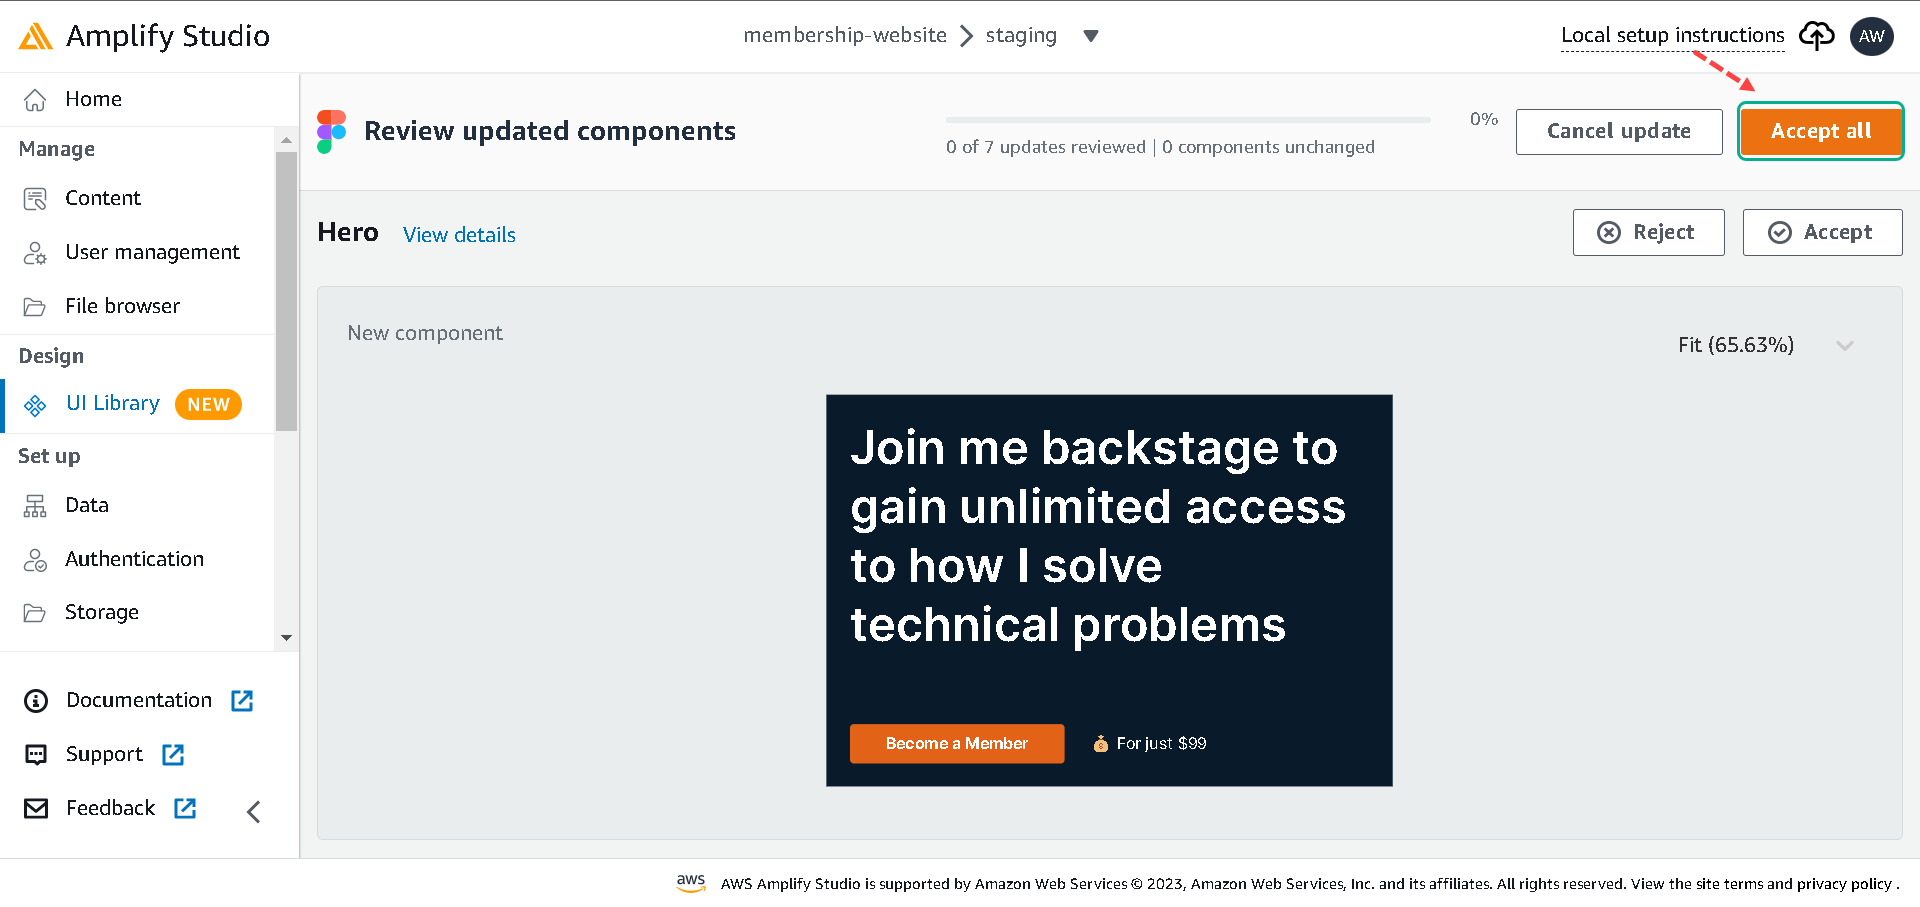
Now, we have all the components in the Amplify project the same way they are in Figma.
What’s Next?
In the next lesson, we’ll setup a Next.js project.